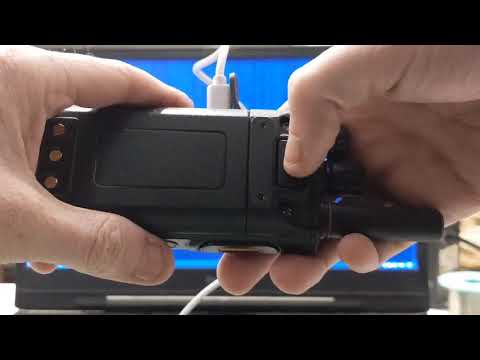
Rooting HIROYASU HI-B8 Zello PoC FM Walkie Talkie
Gaining Root Permissions on the HIROYASU HI-B8 Zello PoC FM Walkie Talkie. To disable loud boot animation sounds & more.
![]()
Please Note This Is An On-Going Process, So Things May Change.
Summary
The project was initiated due to the device emitting loud sounds during startup and shutdown. This issue led to an investigation into the device’s security, which revealed that it was running an outdated version of the Android operating system. Additional concerns included a lack of European support and the absence of a company website for the vendor. These factors collectively motivated an effort to remove the startup and shutdown sounds. The device’s security settings were not properly configured, allowing users to perform actions that could have been restricted with the appropriate settings enabled. Two methods were identified for removing the audio and boot animation from the device:
Soft Modification:
This approach provides limited root access, but due to a read-only root partition, permanent file system changes are not possible—only temporary modifications can be made. Additionally, unlocking the bootloader triggers security checks, which in turn introduce delays to the boot-up process.
File System Modification (Preferred Method):
This method allows direct modification of hardcoded settings without requiring root access. It involves Mounting the file System onto a Linux Operating System, which should nativly should support the required needed formats allowing for making the necessary changes, before re-uploading it to the device. This process is cleaner, faster, and avoids triggering security mechanisms that occur when using the first method.
- Rooting HIROYASU HI-B8 Zello PoC FM Walkie Talkie
- Summary
- About Radio
- Required software:
- Kali Linux Virtual Machine
- Backup Full Image
- Dumping the Boot (Optional Slower Booting Times)
- Installing Magisk (Optional Slower Booting Times)
- Erase Userdata & Metadata (Optional Slower Booting Times)
- Writing the Custom Patched Bootrom (Optional Slower Booting Times)
- Unlocking The Bootloader (Optional Slower Booting Times)
- Enabling Root Access (Optional Slower Booting Times)
- Soft Disable Boot Animation (Optional Slower Booting Times)
- Replace The Boot Splash images (Optional Slower Booting Times)
- Create Custom Boot Animation (Optional Slower Booting Times)
- File System Modification (Preferred Method):
- Additional Commands & Modes
- Internals
- Additional Notes
- Resources
- Credits
About Radio
The HIROYASU HI-B8 is a multi-functional device that integrates features typically found in smartphones, walkie-talkies, GPS trackers, and FM radios. Designed to support both professional and recreational communication needs, it combines robust connectivity options with a compact and durable design.
The device supports 2G, 3G, and 4G LTE networks, providing reliable voice and data communication, including in areas with limited coverage. It is equipped with Zello Push-to-Talk (PoC) functionality, which facilitates instant communication across networks, and also includes an FM radio for traditional broadcast use.
The HI-B8 runs on the Android 9.0 operating system, offering access to a wide range of applications and customization options. Its 2.4-inch touchscreen interface supports ease of use in various environments. With 2GB of RAM and 16GB of internal storage, the device provides sufficient capacity for essential applications and files.
Integrated GPS functionality enables location tracking, navigation, and coordinate sharing, making it suitable for tasks requiring geolocation. A voice recording feature is included for capturing audio notes, conversations, or other critical audio data.
The device is engineered to be durable, supporting use in challenging environments such as construction sites, outdoor expeditions, or industrial settings. Its compact design and combination of communication tools make it a practical choice for users requiring a versatile communication device.
OS: Android 9.0
Hardware Specifications:
- CPU: MTK6739 Quad-cord 1.3Ghz 64bits ARM
- Memory: 2GB RAM+16GB ROM
- LCD Size: 2.4”TFT Touch
- Bluetooth/WIFI: Support
- GPS/BD:Support
- Speaker: 2W output
- Battery: 4000mAh
- Dimension: 1605530mm
- Device Weight: 200g (battery and antenna installed)
- Working Environment: -20°c ~85°c
- Working Voltage:3.7V
- Receive Sensitivity:-106dbm
- Max.Transmit Power: 23-25dBm @all up bits
- Waterproof Level: IP54
- Earphone Jack: 3.5mm single plug
- USB Interface: Type-c
Cellular Network Specifications:
- 2G GSM850/900/1800/1900MHz
- 3G WCDMA: B1/B2/B5/B8
- 4GFDD: B1/B3/B5/B7/B8/B20/B28A/B28B
- 4GTDD:B38/B39/B40/B41
Required software:
ADB Installation
Download the Android SDK Platform Tools ZIP file for Windows
- Extract the ZIP File in your computer’s Downloads folder.
- Right-click the ZIP file and select
Extract All. - Choose a destination folder where you want to extract the files, and click
Extract. This will create a folder containing the ADB and other tools. - Navigate to the folder where you extracted the contents of the ZIP file.
- This folder should contain the
adb.exefile. Click on the folder’s address bar at the top. It will display the full path to the folder. - Open command prompt and
cdto the path copied from the address bar. - Adb.exe can now be executed with
./adb -h.
The path used in this guide is C:\Users\Gamer\adb-fastboot\platform-tools\ so when this is displayed use your own path.
MTK Client Installation
Note: most of this guide taken from here with a few minor changes, such as i had problems with installing python modules due to a long path problem in windows 10, which was resolved using a registry edit.
Install Winfsp (for fuse) Download and install
Download the latest MTK Client and install unzip and navigate into its path with command prompt, Then install the tools requirements.
pip3 install -r requirements.txt
Fix: Create a file called Long-pathfix.reg and place the following in to the file.
   Windows Registry Editor Version 5.00

   [HKEY_LOCAL_MACHINE\SYSTEM\CurrentControlSet\Control\FileSystem]
   "LongPathsEnabled"=dword:00000001
Then double click on the file and allow it to install. Close Command Prompt and Reopen it and retry installing the requirements.txt
Any other compiling errors try the following:
- Download and Install the Build Tools:
- Go to the Visual Studio Build Tools page. Download the installer and run it.
- Select the Necessary Workloads:
- In the installer, select the “Desktop development with C++” workload. Ensure that the “MSVC v142 - VS 2019 C++ x64/x86 build tools” (or later) component is selected. You can also check “Windows 10 SDK” if it’s not already selected. - Unselect Windows 11 as it’s Not Required
-
Complete the Installation:
- Click on the “Install” button to begin the installation. Follow the prompts to complete the installation. Restart your computer if required.
Finally download usbdk installer from here and install it. This should be all the necessary requirements to get started completed.
Kali Linux Virtual Machine
Note Kali linux is not required. Any linux system with ext4 support and sudo or root permissions should work.
Kali As A Pre Made Virtual Machine
or
Installing Kali As A Virtual Machine
Map Shared Directory
Click on the Kali Virtual Machine, before starting it up and map a share to the location MTK client folder is mapped to. In the below example it was are Desktop, This then allowed us to navigate from the desktop into the MTK client directory as shown in the guide.

Backup Full Image
Before starting this project its advised to make a full backup of the radio, this will later allow you to restore if anything goes wrong. Please note this could take around 10-15 minutes to copy the file back across the usb to the local computer. the overall file will also take up around 14.5 GB of local space.
Please Note: In the example the instructions contain the following text:
Port - Hint:

Power off the phone before connecting.
For brom mode, press and hold vol up, vol dwn, or all hw buttons and connect usb.
For preloader mode, don't press any hw button and connect usb.
If it is already connected and on, hold power for 10 seconds to reset.
This is not entirely accurate, we need to perform the following steps:
- Power Off The Radio With A USB Cabled Plugged Into the radio and the computer and Remove The Battery.
- Reconnect The Battery And wait for the USB connection notification sound on the computer.
- Disconnect and reconnect the battery again, the radio should now be detected.
The video video below demonstrates the process:
If It Fails Just Redo The Whole Process, Please Note it took a few times to get it working with the commands so if it does not get detected don’t panic just keep trying.
Finally, This will need to be reproduced for all the commands used below until you have completed the process.
C:\Users\Gamer\Desktop\mtkclient-main\mtkclient-main>python3 mtk.py rf backup.img
MTK Flash/Exploit Client Public V2.0.1 (c) B.Kerler 2018-2024

Preloader - Status: Waiting for PreLoader VCOM, please reconnect mobile to brom mode

Port - Hint:

Power off the phone before connecting.
For brom mode, press and hold vol up, vol dwn, or all hw buttons and connect usb.
For preloader mode, don't press any hw button and connect usb.
If it is already connected and on, hold power for 10 seconds to reset.


........


...Port - Device detected :)
Preloader -     CPU:                    MT6739/MT6731/MT8765()
Preloader -     HW version:             0x0
Preloader -     WDT:                    0x10007000
Preloader -     Uart:                   0x11002000
Preloader -     Brom payload addr:      0x100a00
Preloader -     DA payload addr:        0x201000
Preloader -     CQ_DMA addr:            0x10212000
Preloader -     Var1:                   0xb4
Preloader - Disabling Watchdog...
Preloader - HW code:                    0x699
Preloader - Target config:              0x0
Preloader -     SBC enabled:            False
Preloader -     SLA enabled:            False
Preloader -     DAA enabled:            False
Preloader -     SWJTAG enabled:         False
Preloader -     EPP_PARAM at 0x600 after EMMC_BOOT/SDMMC_BOOT:  False
Preloader -     Root cert required:     False
Preloader -     Mem read auth:          False
Preloader -     Mem write auth:         False
Preloader -     Cmd 0xC8 blocked:       False
Preloader - Get Target info
Preloader -     HW subcode:             0x8a00
Preloader -     HW Ver:                 0xcb00
Preloader -     SW Ver:                 0x2
Preloader - ME_ID:                      8C9061A2190D6F2C543FF335D358DBB6
Preloader - SOC_ID:                     4A13B658562E8689A847DCA687CFE3C339F3C1866DABBF304FFCD5EEC4CF47D4
DaHandler - Device is unprotected.
DaHandler - Device is in Preloader-Mode.
DAXFlash - Uploading xflash stage 1 from MTK_DA_V5.bin
XFlashExt - Patching da1 ...
Mtk - Patched "Patched loader msg" in preloader
Mtk - Patched "hash_check" in preloader
Mtk - Patched "Patched loader msg" in preloader
Mtk - Patched "get_vfy_policy" in preloader
XFlashExt - Patching da2 ...
XFlashExt - Security check patched
XFlashExt - DA version anti-rollback patched
XFlashExt - SBC patched to be disabled
XFlashExt - Register read/write not allowed patched
DAXFlash - Successfully uploaded stage 1, jumping ..
Preloader - Jumping to 0x200000
Preloader - Jumping to 0x200000: ok.
DAXFlash - Successfully received DA sync
DAXFlash - Uploading stage 2...
DAXFlash - Upload data was accepted. Jumping to stage 2...
DAXFlash - Boot to succeeded.
DAXFlash - Successfully uploaded stage 2
DAXFlash - DA SLA is disabled
DAXFlash - EMMC FWVer:      0x0
DAXFlash - EMMC ID:         QE63MB
DAXFlash - EMMC CID:        150100514536334d4203aba6f2a5954b
DAXFlash - EMMC Boot1 Size: 0x400000
DAXFlash - EMMC Boot2 Size: 0x400000
DAXFlash - EMMC GP1 Size:   0x0
DAXFlash - EMMC GP2 Size:   0x0
DAXFlash - EMMC GP3 Size:   0x0
DAXFlash - EMMC GP4 Size:   0x0
DAXFlash - EMMC RPMB Size:  0x400000
DAXFlash - EMMC USER Size:  0x3a3e00000
DAXFlash - HW-CODE         : 0x699
DAXFlash - HWSUB-CODE      : 0x8A00
DAXFlash - HW-VERSION      : 0xCB00
DAXFlash - SW-VERSION      : 0x2
DAXFlash - CHIP-EVOLUTION  : 0x0
DAXFlash - DA-VERSION      : 1.0
DAXFlash - Extensions were accepted. Jumping to extensions...
DAXFlash - Boot to succeeded.
DAXFlash - DA Extensions successfully added
Dumping sector 0 with flash size 0x3a3e00000 as backup.img.
Progress: |██████████| 100.0% Read (0x1D1EA80/0x1D1F000, ) 13.65 MB/s75 MB/sMB/s
Dumped sector 0 with flash size 0x3a3e00000 as backup.img.

C:\Users\Gamer\Desktop\mtkclient-main\mtkclient-main>
Store this file some where safe for later.
From this point in the guide it is possible to go two different routes as explained in the summary.
The Prefered method requires no root on the device but a Linux Operating System to make edits to the radios file system which does not cause any security mechanism to kick in and the boot times are not effected.
The Second slow booting method with soft root access, follow along below.
Dumping the Boot (Optional Slower Booting Times)
Once the full backup has been completed the boot image can be downloaded. As explained by the instructions on the original README that comes with Mtk Client we need to first ensure we can dump the boot loader this can be done with the following commands and also displays the output from the targeted device.
Below Is a Example of Downloading the Bootloader to the local computer as boot.bin:
C:\Users\Gamer\Desktop\mtkclient-main\mtkclient-main>python3 mtk.py r boot boot.bin
MTK Flash/Exploit Client Public V2.0.1 (c) B.Kerler 2018-2024

Preloader - Status: Waiting for PreLoader VCOM, please reconnect mobile to brom mode


Port - Hint:

Power off the phone before connecting.
For brom mode, press and hold vol up, vol dwn, or all hw buttons and connect usb.
For preloader mode, don't press any hw button and connect usb.
If it is already connected and on, hold power for 10 seconds to reset.


.........Port - Device detected :)
Preloader -     CPU:                    MT6739/MT6731/MT8765()
Preloader -     HW version:             0x0
Preloader -     WDT:                    0x10007000
Preloader -     Uart:                   0x11002000
Preloader -     Brom payload addr:      0x100a00
Preloader -     DA payload addr:        0x201000
Preloader -     CQ_DMA addr:            0x10212000
Preloader -     Var1:                   0xb4
Preloader - Disabling Watchdog...
Preloader - HW code:                    0x699
Preloader - Target config:              0x0
Preloader -     SBC enabled:            False
Preloader -     SLA enabled:            False
Preloader -     DAA enabled:            False
Preloader -     SWJTAG enabled:         False
Preloader -     EPP_PARAM at 0x600 after EMMC_BOOT/SDMMC_BOOT:  False
Preloader -     Root cert required:     False
Preloader -     Mem read auth:          False
Preloader -     Mem write auth:         False
Preloader -     Cmd 0xC8 blocked:       False
Preloader - Get Target info
Preloader -     HW subcode:             0x8a00
Preloader -     HW Ver:                 0xcb00
Preloader -     SW Ver:                 0x2
Preloader - ME_ID:                      8C9061A2190D6F2C543FF335D358DBB6
Preloader - SOC_ID:                     4A13B658562E8689A847DCA687CFE3C339F3C1866DABBF304FFCD5EEC4CF47D4
DaHandler - Device is unprotected.
DaHandler - Device is in Preloader-Mode.
DAXFlash - Uploading xflash stage 1 from MTK_DA_V5.bin
XFlashExt - Patching da1 ...
Mtk - Patched "Patched loader msg" in preloader
Mtk - Patched "hash_check" in preloader
Mtk - Patched "Patched loader msg" in preloader
Mtk - Patched "get_vfy_policy" in preloader
XFlashExt - Patching da2 ...
XFlashExt - Security check patched
XFlashExt - DA version anti-rollback patched
XFlashExt - SBC patched to be disabled
XFlashExt - Register read/write not allowed patched
DAXFlash - Successfully uploaded stage 1, jumping ..
Preloader - Jumping to 0x200000
Preloader - Jumping to 0x200000: ok.
DAXFlash - Successfully received DA sync
DAXFlash - Uploading stage 2...
DAXFlash - Upload data was accepted. Jumping to stage 2...
DAXFlash - Boot to succeeded.
DAXFlash - Successfully uploaded stage 2
DAXFlash - DA SLA is disabled
DAXFlash - EMMC FWVer:      0x0
DAXFlash - EMMC ID:         QE63MB
DAXFlash - EMMC CID:        150100514536334d4203aba6f2a5954b
DAXFlash - EMMC Boot1 Size: 0x400000
DAXFlash - EMMC Boot2 Size: 0x400000
DAXFlash - EMMC GP1 Size:   0x0
DAXFlash - EMMC GP2 Size:   0x0
DAXFlash - EMMC GP3 Size:   0x0
DAXFlash - EMMC GP4 Size:   0x0
DAXFlash - EMMC RPMB Size:  0x400000
DAXFlash - EMMC USER Size:  0x3a3e00000
DAXFlash - HW-CODE         : 0x699
DAXFlash - HWSUB-CODE      : 0x8A00
DAXFlash - HW-VERSION      : 0xCB00
DAXFlash - SW-VERSION      : 0x2
DAXFlash - CHIP-EVOLUTION  : 0x0
DAXFlash - DA-VERSION      : 1.0
DAXFlash - Extensions were accepted. Jumping to extensions...
DAXFlash - Boot to succeeded.
DAXFlash - DA Extensions successfully added
DaHandler - Requesting available partitions ....
DaHandler - Dumping partition "boot"
Progress: |██████████| 100.0% Read (0xC000/0xC000, ) 0.00 MB/s00 MB/s
DaHandler - Dumped sector 553216 with sector count 49152 as boot.bin.
Installing Magisk (Optional Slower Booting Times)
When the bootloader been successfully downloaded to the local computer we next need to install the Magisk on the radio to continue the process of patching the bootloader.
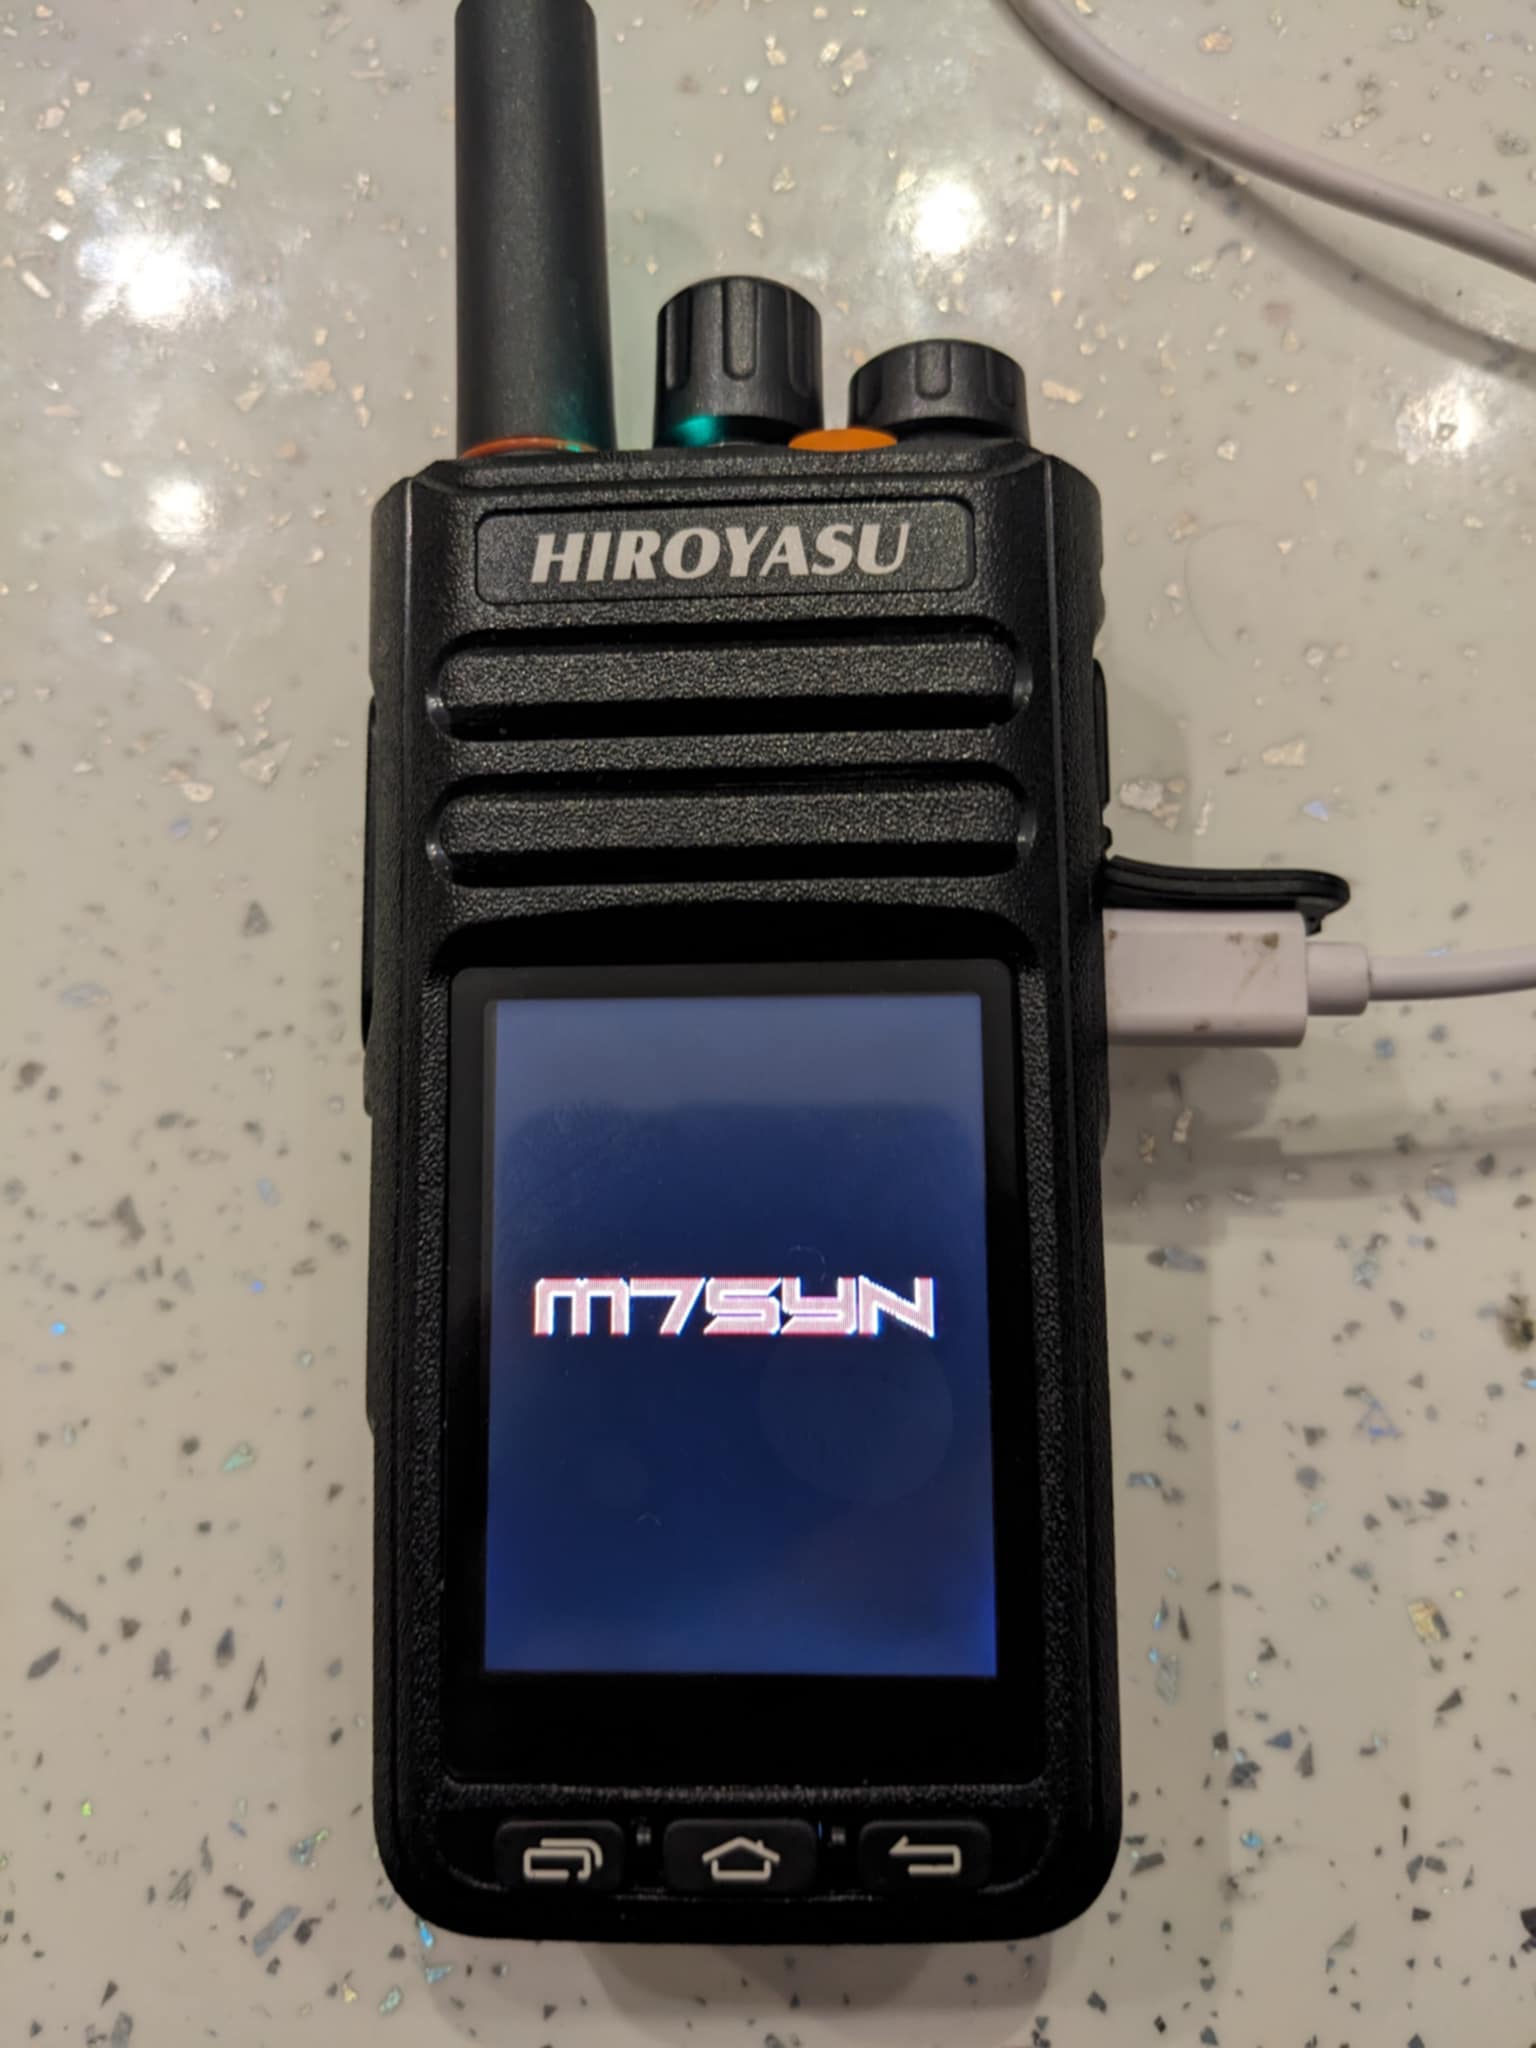
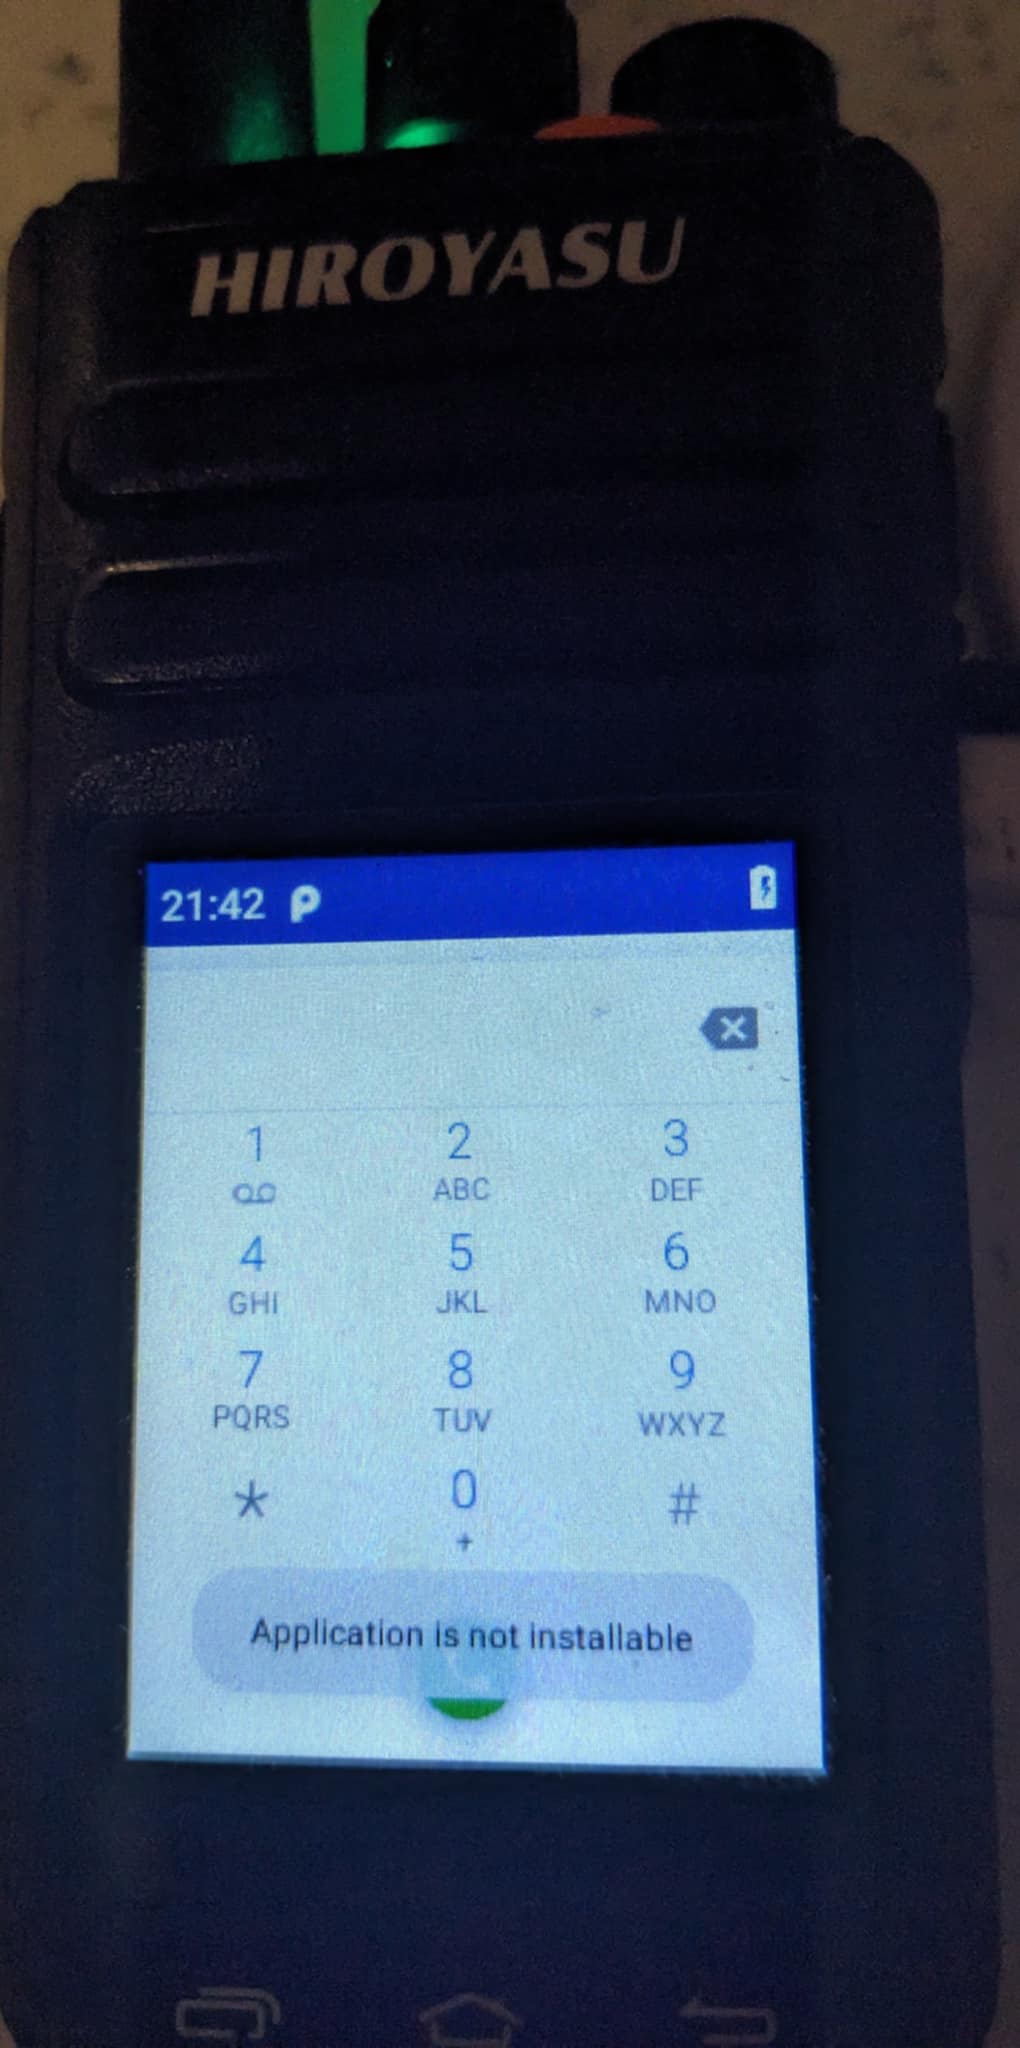
Please note this cannot be completed from a factory device until you have navigated to the phone dial pad,
then entering the follow sequence *#13579*# upon completion it should flash up at the bottom as displayed in the image below.
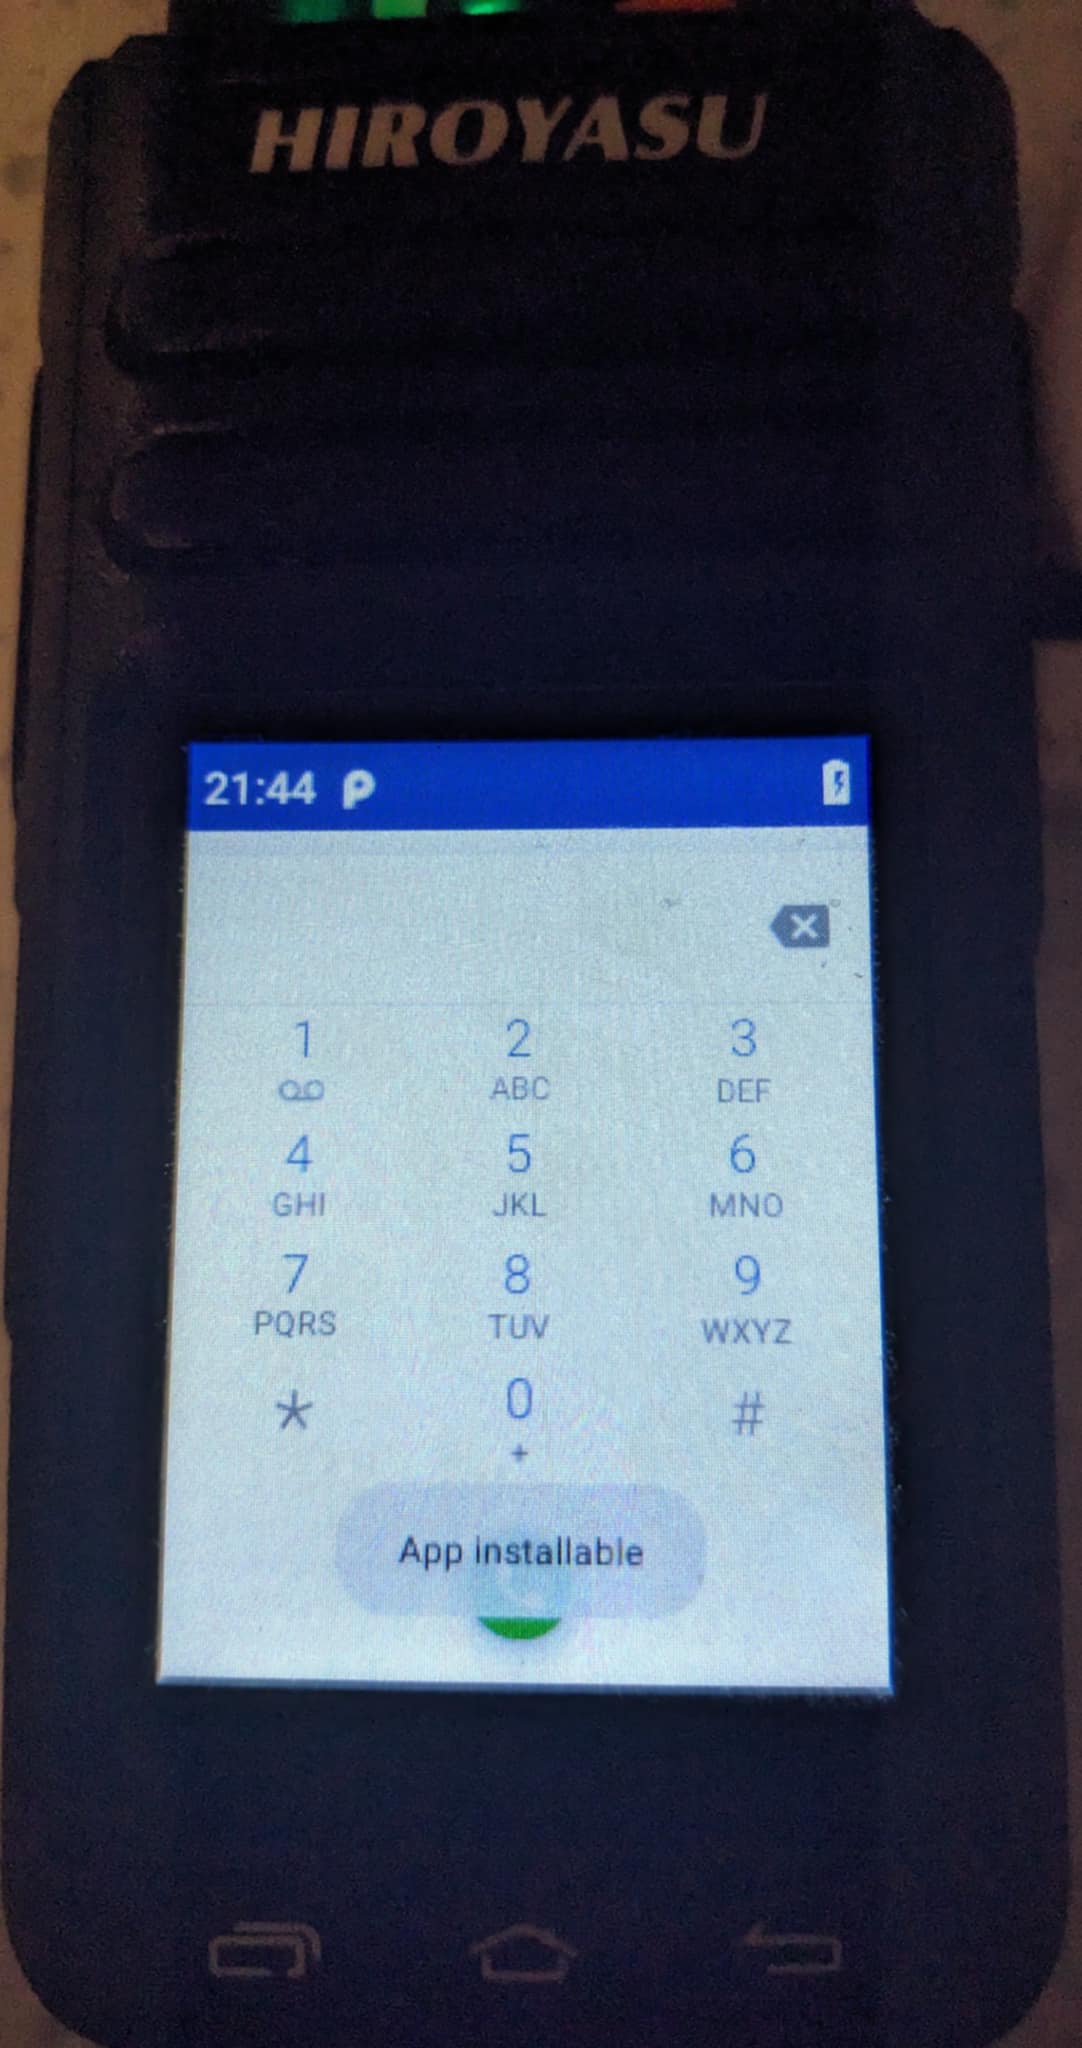
If you have done this prior you may have just reverted the settings for this, which is not a problem as it works like a switch by using the key codes you can enable or disable app installation access. Although if this process is not completed Installing Magisk Will Fail.
Upon completion of unlocking the app installation procces we then need to download the patched Magisk APK file
Once Magisk app is downloaded a few more settings settings need to be set before continuing with the rest of the steps, such as enabling OEM unlocking and USB Debugging. When installed Magisk will allow us to send files to the radio and perform other tasks via command line “adb” on the radio.
This can be be achieved by proceeding with the following on the radio its self.
Enable Developer Mode:
- Navigate Settings/About Followed By phone/Version, Tap 7x on build number
OEM Unlock (Possibly Not Needed as mtk client forces this. on the to be tested list)
- Navigate To Settings/Additional settings/Developer options, enable “OEM unlock”
USB Debugging:
- Navigate To Settings/Additional settings/Developer options, enable USB Debugging”
Upon completion of the settings changes required for installing Masgisk and access to the device over USB. Its now possible to remotely install the apk file following the below commands.
Install magisk apk
adb install app-release.apk
if not already done so accept certificate prompt on the radios screen to allow adb connection.
Next we need to Upload boot file that was downloaded from the radio, back to the radio in the following directory /sdcard/Download This again, can be done with the adb.
adb push boot.img /sdcard/Download
Up on completion of the upload to the radio. We now need to pick up the device and Start Magisk app and navigate to the file manager then find the app called app-release.apk and tap on it to Install.
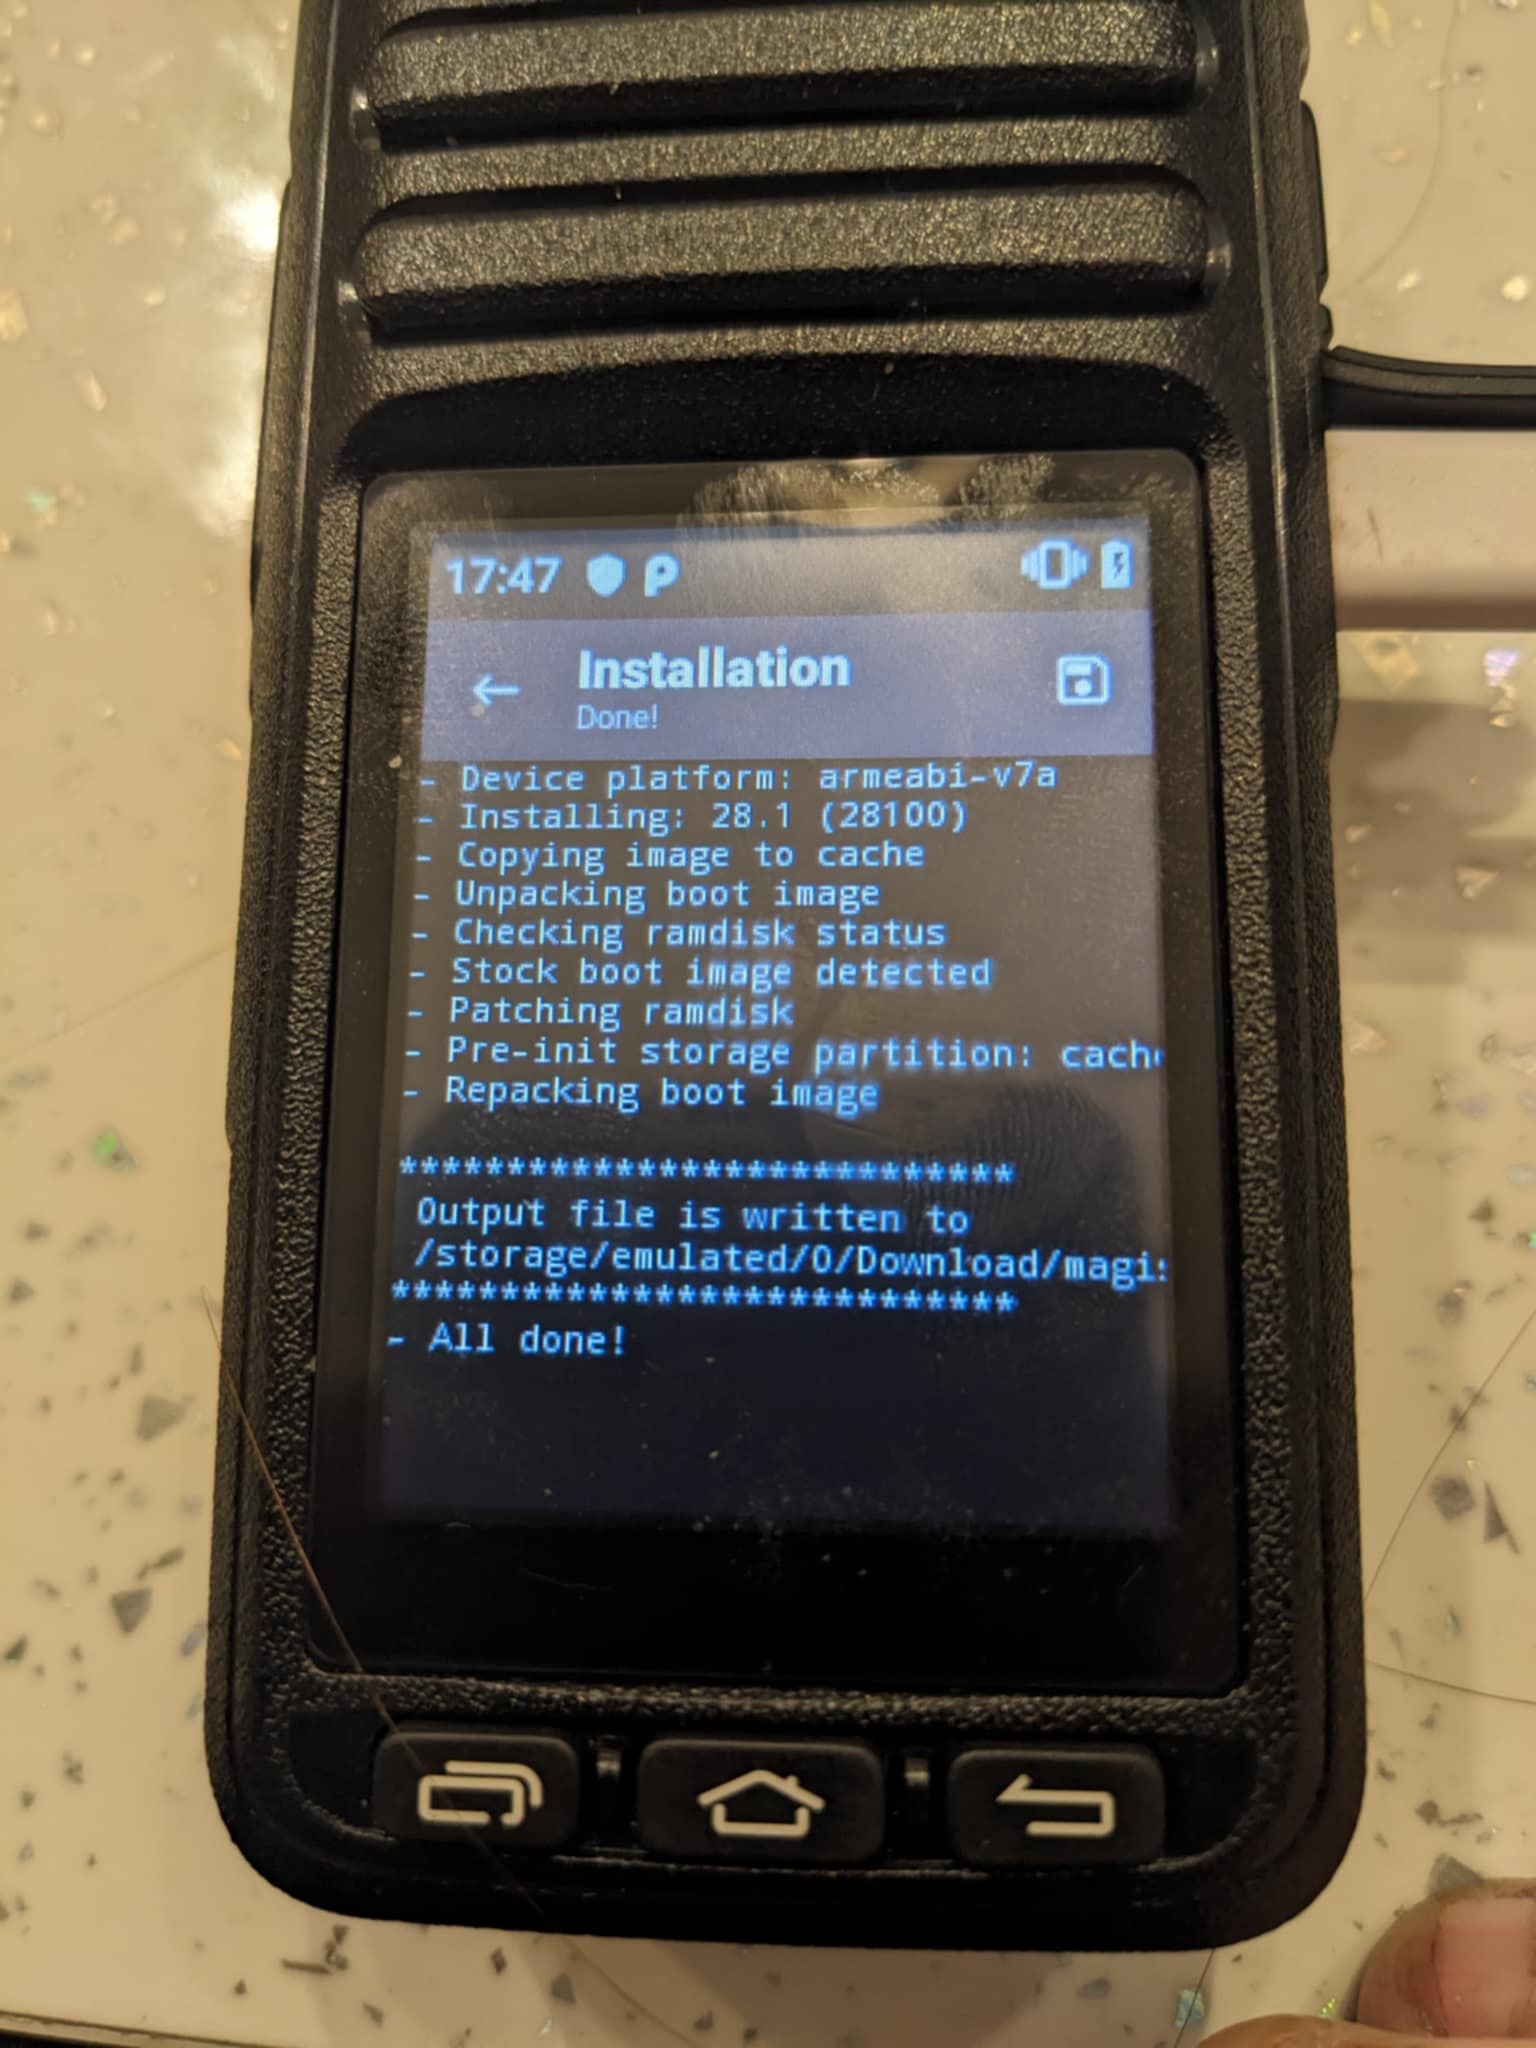
Once the app is installed we need to open it and select the boot.bin file we have uploaded prior. This will then start the patching process as displayed in the below screenshot.
Now that Magisk has patched the boot file we need to download it back to the host computer and move it back into the mtk client directory as boot.patched for command simplicity.
adb pull /sdcard/Download/[displayed magisk patched boot filename here]

mv [displayed magisk patched boot filename here] boot.patched
Erase Userdata & Metadata (Optional Slower Booting Times)
Note: This will remove all apps that are not default to the rom so if you installed additional apps you will loose them so ensure you have them backed-up.
C:\Users\Gamer\Desktop\mtkclient-main\mtkclient-main>python3 mtk.py e userdata,metadata
MTK Flash/Exploit Client Public V2.0.1 (c) B.Kerler 2018-2024

Preloader - Status: Waiting for PreLoader VCOM, please reconnect mobile to brom mode


Port - Hint:

Power off the phone before connecting.
For brom mode, press and hold vol up, vol dwn, or all hw buttons and connect usb.
For preloader mode, don't press any hw button and connect usb.
If it is already connected and on, hold power for 10 seconds to reset.


.Port - Device detected :)
Preloader -     CPU:                    MT6739/MT6731/MT8765()
Preloader -     HW version:             0x0
Preloader -     WDT:                    0x10007000
Preloader -     Uart:                   0x11002000
Preloader -     Brom payload addr:      0x100a00
Preloader -     DA payload addr:        0x201000
Preloader -     CQ_DMA addr:            0x10212000
Preloader -     Var1:                   0xb4
Preloader - Disabling Watchdog...
Preloader - HW code:                    0x699
Preloader - Target config:              0x0
Preloader -     SBC enabled:            False
Preloader -     SLA enabled:            False
Preloader -     DAA enabled:            False
Preloader -     SWJTAG enabled:         False
Preloader -     EPP_PARAM at 0x600 after EMMC_BOOT/SDMMC_BOOT:  False
Preloader -     Root cert required:     False
Preloader -     Mem read auth:          False
Preloader -     Mem write auth:         False
Preloader -     Cmd 0xC8 blocked:       False
Preloader - Get Target info
Preloader -     HW subcode:             0x8a00
Preloader -     HW Ver:                 0xcb00
Preloader -     SW Ver:                 0x2
Preloader - ME_ID:                      8C9061A2190D6F2C543FF335D358DBB6
Preloader - SOC_ID:                     4A13B658562E8689A847DCA687CFE3C339F3C1866DABBF304FFCD5EEC4CF47D4
DaHandler - Device is unprotected.
DaHandler - Device is in Preloader-Mode.
DAXFlash - Uploading xflash stage 1 from MTK_DA_V5.bin
XFlashExt - Patching da1 ...
Mtk - Patched "Patched loader msg" in preloader
Mtk - Patched "hash_check" in preloader
Mtk - Patched "Patched loader msg" in preloader
Mtk - Patched "get_vfy_policy" in preloader
XFlashExt - Patching da2 ...
XFlashExt - Security check patched
XFlashExt - DA version anti-rollback patched
XFlashExt - SBC patched to be disabled
XFlashExt - Register read/write not allowed patched
DAXFlash - Successfully uploaded stage 1, jumping ..
Preloader - Jumping to 0x200000
Preloader - Jumping to 0x200000: ok.
DAXFlash - Successfully received DA sync
DAXFlash - Uploading stage 2...
DAXFlash - Upload data was accepted. Jumping to stage 2...
DAXFlash - Boot to succeeded.
DAXFlash - Successfully uploaded stage 2
DAXFlash - DA SLA is disabled
DAXFlash - EMMC FWVer:      0x0
DAXFlash - EMMC ID:         QE63MB
DAXFlash - EMMC CID:        150100514536334d4203aba6f2a5954b
DAXFlash - EMMC Boot1 Size: 0x400000
DAXFlash - EMMC Boot2 Size: 0x400000
DAXFlash - EMMC GP1 Size:   0x0
DAXFlash - EMMC GP2 Size:   0x0
DAXFlash - EMMC GP3 Size:   0x0
DAXFlash - EMMC GP4 Size:   0x0
DAXFlash - EMMC RPMB Size:  0x400000
DAXFlash - EMMC USER Size:  0x3a3e00000
DAXFlash - HW-CODE         : 0x699
DAXFlash - HWSUB-CODE      : 0x8A00
DAXFlash - HW-VERSION      : 0xCB00
DAXFlash - SW-VERSION      : 0x2
DAXFlash - CHIP-EVOLUTION  : 0x0
DAXFlash - DA-VERSION      : 1.0
DAXFlash - Extensions were accepted. Jumping to extensions...
DAXFlash - Boot to succeeded.
DAXFlash - DA Extensions successfully added
DAXFlash - Formatting addr 0x7b000000 with length 0x327dfbe00, please standby....
Progress: |██████████| 100.0% Erasing (0x193EFDF/0x193EFDF, ) 63650.70 MB/s
DAXFlash - Successsfully formatted addr 0x7b000000 with length 13553876480.
Formatted sector 4030464 with sector count 26472415.
DAXFlash - Formatting addr 0x5688000 with length 0x2000000, please standby....
Progress: |██████████| 100.0% Erasing (0x10000/0x10000, ) 256.06 MB/s
DAXFlash - Successsfully formatted addr 0x5688000 with length 33554432.
Formatted sector 177216 with sector count 65536.
All partitions formatted.

C:\Users\Gamer\Desktop\mtkclient-main\mtkclient-main>
Writing the Custom Patched Bootrom (Optional Slower Booting Times)
C:\Users\Gamer\Desktop\mtkclient-main\mtkclient-main>python3 mtk.py w boot boot.patched
MTK Flash/Exploit Client Public V2.0.1 (c) B.Kerler 2018-2024

Preloader - Status: Waiting for PreLoader VCOM, please reconnect mobile to brom mode

Port - Hint:

Power off the phone before connecting.
For brom mode, press and hold vol up, vol dwn, or all hw buttons and connect usb.
For preloader mode, don't press any hw button and connect usb.
If it is already connected and on, hold power for 10 seconds to reset.


...........
Port - Device detected :)
Preloader -     CPU:                    MT6739/MT6731/MT8765()
Preloader -     HW version:             0x0
Preloader -     WDT:                    0x10007000
Preloader -     Uart:                   0x11002000
Preloader -     Brom payload addr:      0x100a00
Preloader -     DA payload addr:        0x201000
Preloader -     CQ_DMA addr:            0x10212000
Preloader -     Var1:                   0xb4
Preloader - Disabling Watchdog...
Preloader - HW code:                    0x699
Preloader - Target config:              0x0
Preloader -     SBC enabled:            False
Preloader -     SLA enabled:            False
Preloader -     DAA enabled:            False
Preloader -     SWJTAG enabled:         False
Preloader -     EPP_PARAM at 0x600 after EMMC_BOOT/SDMMC_BOOT:  False
Preloader -     Root cert required:     False
Preloader -     Mem read auth:          False
Preloader -     Mem write auth:         False
Preloader -     Cmd 0xC8 blocked:       False
Preloader - Get Target info
Preloader -     HW subcode:             0x8a00
Preloader -     HW Ver:                 0xcb00
Preloader -     SW Ver:                 0x2
Preloader - ME_ID:                      8C9061A2190D6F2C543FF335D358DBB6
Preloader - SOC_ID:                     4A13B658562E8689A847DCA687CFE3C339F3C1866DABBF304FFCD5EEC4CF47D4
DaHandler - Device is unprotected.
DaHandler - Device is in Preloader-Mode.
DAXFlash - Uploading xflash stage 1 from MTK_DA_V5.bin
XFlashExt - Patching da1 ...
Mtk - Patched "Patched loader msg" in preloader
Mtk - Patched "hash_check" in preloader
Mtk - Patched "Patched loader msg" in preloader
Mtk - Patched "get_vfy_policy" in preloader
XFlashExt - Patching da2 ...
XFlashExt - Security check patched
XFlashExt - DA version anti-rollback patched
XFlashExt - SBC patched to be disabled
XFlashExt - Register read/write not allowed patched
DAXFlash - Successfully uploaded stage 1, jumping ..
Preloader - Jumping to 0x200000
Preloader - Jumping to 0x200000: ok.
DAXFlash - Successfully received DA sync
DAXFlash - Uploading stage 2...
DAXFlash - Upload data was accepted. Jumping to stage 2...
DAXFlash - Boot to succeeded.
DAXFlash - Successfully uploaded stage 2
DAXFlash - DA SLA is disabled
DAXFlash - EMMC FWVer:      0x0
DAXFlash - EMMC ID:         QE63MB
DAXFlash - EMMC CID:        150100514536334d4203aba6f2a5954b
DAXFlash - EMMC Boot1 Size: 0x400000
DAXFlash - EMMC Boot2 Size: 0x400000
DAXFlash - EMMC GP1 Size:   0x0
DAXFlash - EMMC GP2 Size:   0x0
DAXFlash - EMMC GP3 Size:   0x0
DAXFlash - EMMC GP4 Size:   0x0
DAXFlash - EMMC RPMB Size:  0x400000
DAXFlash - EMMC USER Size:  0x3a3e00000
DAXFlash - HW-CODE         : 0x699
DAXFlash - HWSUB-CODE      : 0x8A00
DAXFlash - HW-VERSION      : 0xCB00
DAXFlash - SW-VERSION      : 0x2
DAXFlash - CHIP-EVOLUTION  : 0x0
DAXFlash - DA-VERSION      : 1.0
DAXFlash - Extensions were accepted. Jumping to extensions...
DAXFlash - Boot to succeeded.
DAXFlash - DA Extensions successfully added
Progress: |██████████| 100.0% Write (0xC000/0xC000, ) 4.27 MB/s74 MB/s
Wrote boot.patched to sector 553216 with sector count 49152.


C:\Users\Gamer\Desktop\mtkclient-main\mtkclient-main>
Unlocking The Bootloader (Optional Slower Booting Times)
The last stage of using MTK Client is to unlock the bootloader which allows for Magisk to gain its root access. It is no longer required to use MTK client and its key combinations from here onwards, unless you later want to change the boot splash screen
C:\Users\Gamer\Desktop\mtkclient-main\mtkclient-main>python3 mtk.py da seccfg unlock
MTK Flash/Exploit Client Public V2.0.1 (c) B.Kerler 2018-2024

Preloader - Status: Waiting for PreLoader VCOM, please reconnect mobile to brom mode

Port - Hint:

Power off the phone before connecting.
For brom mode, press and hold vol up, vol dwn, or all hw buttons and connect usb.
For preloader mode, don't press any hw button and connect usb.
If it is already connected and on, hold power for 10 seconds to reset.


...........Port - Device detected :)
Preloader -     CPU:                    MT6739/MT6731/MT8765()
Preloader -     HW version:             0x0
Preloader -     WDT:                    0x10007000
Preloader -     Uart:                   0x11002000
Preloader -     Brom payload addr:      0x100a00
Preloader -     DA payload addr:        0x201000
Preloader -     CQ_DMA addr:            0x10212000
Preloader -     Var1:                   0xb4
Preloader - Disabling Watchdog...
Preloader - HW code:                    0x699
Preloader - Target config:              0x0
Preloader -     SBC enabled:            False
Preloader -     SLA enabled:            False
Preloader -     DAA enabled:            False
Preloader -     SWJTAG enabled:         False
Preloader -     EPP_PARAM at 0x600 after EMMC_BOOT/SDMMC_BOOT:  False
Preloader -     Root cert required:     False
Preloader -     Mem read auth:          False
Preloader -     Mem write auth:         False
Preloader -     Cmd 0xC8 blocked:       False
Preloader - Get Target info
Preloader -     HW subcode:             0x8a00
Preloader -     HW Ver:                 0xcb00
Preloader -     SW Ver:                 0x2
Preloader - ME_ID:                      8C9061A2190D6F2C543FF335D358DBB6
Preloader - SOC_ID:                     4A13B658562E8689A847DCA687CFE3C339F3C1866DABBF304FFCD5EEC4CF47D4
DaHandler - Device is unprotected.
DaHandler - Device is in Preloader-Mode.
DAXFlash - Uploading xflash stage 1 from MTK_DA_V5.bin
XFlashExt - Patching da1 ...
Mtk - Patched "Patched loader msg" in preloader
Mtk - Patched "hash_check" in preloader
Mtk - Patched "Patched loader msg" in preloader
Mtk - Patched "get_vfy_policy" in preloader
XFlashExt - Patching da2 ...
XFlashExt - Security check patched
XFlashExt - DA version anti-rollback patched
XFlashExt - SBC patched to be disabled
XFlashExt - Register read/write not allowed patched
DAXFlash - Successfully uploaded stage 1, jumping ..
Preloader - Jumping to 0x200000
Preloader - Jumping to 0x200000: ok.
DAXFlash - Successfully received DA sync
DAXFlash - Uploading stage 2...
DAXFlash - Upload data was accepted. Jumping to stage 2...
DAXFlash - Boot to succeeded.
DAXFlash - Successfully uploaded stage 2
DAXFlash - DA SLA is disabled
DAXFlash - EMMC FWVer:      0x0
DAXFlash - EMMC ID:         QE63MB
DAXFlash - EMMC CID:        150100514536334d4203aba6f2a5954b
DAXFlash - EMMC Boot1 Size: 0x400000
DAXFlash - EMMC Boot2 Size: 0x400000
DAXFlash - EMMC GP1 Size:   0x0
DAXFlash - EMMC GP2 Size:   0x0
DAXFlash - EMMC GP3 Size:   0x0
DAXFlash - EMMC GP4 Size:   0x0
DAXFlash - EMMC RPMB Size:  0x400000
DAXFlash - EMMC USER Size:  0x3a3e00000
DAXFlash - HW-CODE         : 0x699
DAXFlash - HWSUB-CODE      : 0x8A00
DAXFlash - HW-VERSION      : 0xCB00
DAXFlash - SW-VERSION      : 0x2
DAXFlash - CHIP-EVOLUTION  : 0x0
DAXFlash - DA-VERSION      : 1.0
DAXFlash - Extensions were accepted. Jumping to extensions...
DAXFlash - Boot to succeeded.
DAXFlash - DA Extensions successfully added
XFlashExt - Detected V4 Lockstate
Sej - HACC init
Sej
Sej - [LIB]: ←[31mSEJ Legacy Hardware seems not to be configured correctly. Results may be wrong.←[0m
Sej - HACC run
Sej - HACC terminate
Sej - HACC init
Sej - HACC run
Sej - HACC terminate
DaHandler
DaHandler - [LIB]: ←[31mDevice is already unlocked←[0m

C:\Users\Gamer\Desktop\mtkclient-main\mtkclient-main>
Enabling Root Access (Optional Slower Booting Times)
Once the radio has booted up as normal you will need to reinstall magisk apk and then start it up, This may cause the radio to reboot into recovery mode. If this happens just hold the orange emergency button on the top
The radio will then take a bit of time to reboot. Once it has started up as normal again run a adb shell command from the host computer and if you try “su” command you should notice permissions denied warning. This is fine, the Magisk app is currently blocking access. Open up the app and on the bottom navigation bar select super user and then enable it, now within adb you should be able to use “su” and check your permissions with “id” command.
C:\Users\Gamer\adb-fastboot\platform-tools>adb shell
m3_h:/ $ su
m3_h:/ # id
uid=0(root) gid=0(root) groups=0(root) context=u:r:magisk:s0
m3_h:/ #
Soft Disable Boot Animation (Optional Slower Booting Times)
It is also possible to just disable the boot animation allowing just the boot splash images to become the boot image. This will also prevent the audio from playing and you will loose the shut down animation.
m3_h:/ $ su
m3_h:/ # echo "resetprop debug.sf.nobootanimation 1" > /data/adb/post-fs-data.d/disabled_boot_animations.sh
m3_h:/ # chmod +x /data/adb/post-fs-data.d/disabled_boot_animations.sh
m3_h:/ # reboot
The boot still will be slower then normal due to the orange status in the bootloader. This adds on 5 seconds.
- Green state means the device is locked or verified, the Keystore is verified with an OEM key, and the boot image was verified by the Keystore
- Yellow state means that an alternate keystore was used to verify the boot image
- Orange state indicates that the device is unlocked, so no verification was done.
- Red state means that a device in the locked or verified state had a boot image that did not verify.
You can verify this your self.
m3_h:/ $ su
m3_h:/ # getprop ro.boot.verifiedbootstate
orange
m3_h:/ #
Replace The Boot Splash images (Optional Slower Booting Times)
Download the logo.bin file from the radio with mtk client and using the special button combinations used previously in this guide to get the radio detected. Use the following command to download into the mtk client directory called logo.bin
C:\Users\Gamer\Desktop\mtkclient-main\mtkclient-main>python3 mtk.py r logo logo.bin
MTK Flash/Exploit Client Public V2.0.1 (c) B.Kerler 2018-2024

Preloader - Status: Waiting for PreLoader VCOM, please reconnect mobile to brom mode


Port - Hint:

Power off the phone before connecting.
For brom mode, press and hold vol up, vol dwn, or all hw buttons and connect usb.
For preloader mode, don't press any hw button and connect usb.
If it is already connected and on, hold power for 10 seconds to reset.


...Port - Device detected :)
Preloader -     CPU:                    MT6739/MT6731/MT8765()
Preloader -     HW version:             0x0
Preloader -     WDT:                    0x10007000
Preloader -     Uart:                   0x11002000
Preloader -     Brom payload addr:      0x100a00
Preloader -     DA payload addr:        0x201000
Preloader -     CQ_DMA addr:            0x10212000
Preloader -     Var1:                   0xb4
Preloader - Disabling Watchdog...
Preloader - HW code:                    0x699
Preloader - Target config:              0x0
Preloader -     SBC enabled:            False
Preloader -     SLA enabled:            False
Preloader -     DAA enabled:            False
Preloader -     SWJTAG enabled:         False
Preloader -     EPP_PARAM at 0x600 after EMMC_BOOT/SDMMC_BOOT:  False
Preloader -     Root cert required:     False
Preloader -     Mem read auth:          False
Preloader -     Mem write auth:         False
Preloader -     Cmd 0xC8 blocked:       False
Preloader - Get Target info
Preloader -     HW subcode:             0x8a00
Preloader -     HW Ver:                 0xcb00
Preloader -     SW Ver:                 0x2
Preloader - ME_ID:                      8C9061A2190D6F2C543FF335D358DBB6
Preloader - SOC_ID:                     4A13B658562E8689A847DCA687CFE3C339F3C1866DABBF304FFCD5EEC4CF47D4
DaHandler - Device is unprotected.
DaHandler - Device is in Preloader-Mode.
DAXFlash - Uploading xflash stage 1 from MTK_DA_V5.bin
XFlashExt - Patching da1 ...
Mtk - Patched "Patched loader msg" in preloader
Mtk - Patched "hash_check" in preloader
Mtk - Patched "Patched loader msg" in preloader
Mtk - Patched "get_vfy_policy" in preloader
XFlashExt - Patching da2 ...
XFlashExt - Security check patched
XFlashExt - DA version anti-rollback patched
XFlashExt - SBC patched to be disabled
XFlashExt - Register read/write not allowed patched
DAXFlash - Successfully uploaded stage 1, jumping ..
Preloader - Jumping to 0x200000
Preloader - Jumping to 0x200000: ok.
DAXFlash - Successfully received DA sync
DAXFlash - Uploading stage 2...
DAXFlash - Upload data was accepted. Jumping to stage 2...
DAXFlash - Boot to succeeded.
DAXFlash - Successfully uploaded stage 2
DAXFlash - DA SLA is disabled
DAXFlash - EMMC FWVer:      0x0
DAXFlash - EMMC ID:         QE63MB
DAXFlash - EMMC CID:        150100514536334d4203aba6f2a5954b
DAXFlash - EMMC Boot1 Size: 0x400000
DAXFlash - EMMC Boot2 Size: 0x400000
DAXFlash - EMMC GP1 Size:   0x0
DAXFlash - EMMC GP2 Size:   0x0
DAXFlash - EMMC GP3 Size:   0x0
DAXFlash - EMMC GP4 Size:   0x0
DAXFlash - EMMC RPMB Size:  0x400000
DAXFlash - EMMC USER Size:  0x3a3e00000
DAXFlash - HW-CODE         : 0x699
DAXFlash - HWSUB-CODE      : 0x8A00
DAXFlash - HW-VERSION      : 0xCB00
DAXFlash - SW-VERSION      : 0x2
DAXFlash - CHIP-EVOLUTION  : 0x0
DAXFlash - DA-VERSION      : 1.0
DAXFlash - Extensions were accepted. Jumping to extensions...
DAXFlash - Boot to succeeded.
DAXFlash - DA Extensions successfully added
DaHandler - Requesting available partitions ....
DaHandler - Dumping partition "logo"
Progress: |██████████| 100.0% Read (0x4000/0x4000, ) 12.82 MB/s MB/s
DaHandler - Dumped sector 602368 with sector count 16384 as logo.bin.

C:\Users\Gamer\Desktop\mtkclient-main\mtkclient-main>
Download LogoBuilder_v1.6 from here Extract the contents and modification needs to be performed to the sizes.txt file so that the files will be loaded with the correct screen resolution read for repacking.
Replace the contents of sizes.txt with the following resolutions.
240x320x2
240x320x4
16x23x4
20x23x4
26x38x4
4x19x4
200x288x4
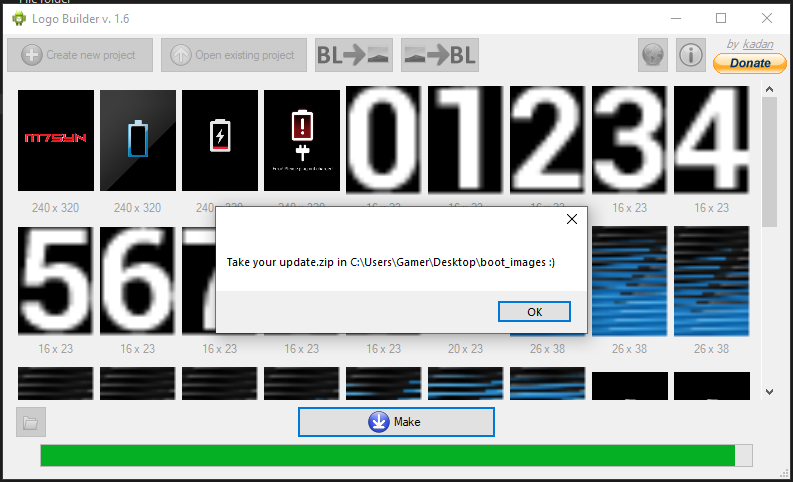
How to use:
- Click “Create project”.
- Select your original logo.bin file and new project folder
- Edit project images as you wish.
- Click “Make” (new logo.bin and update.zip for recovery will be created)
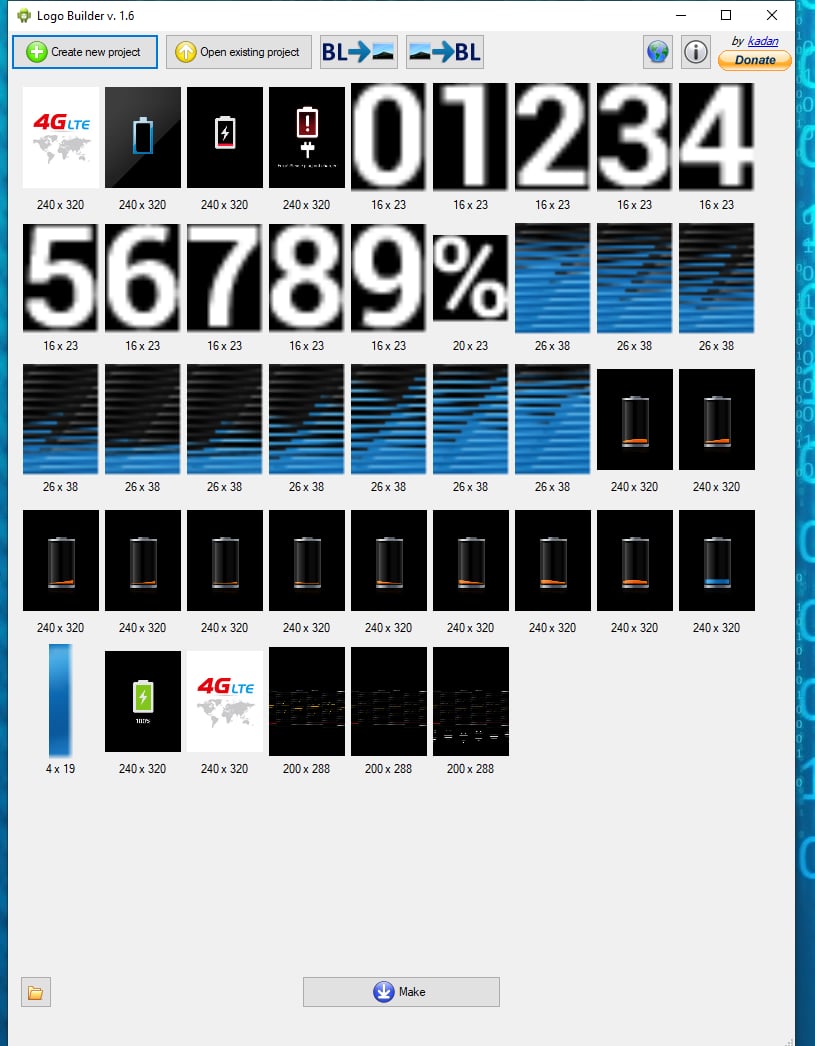
Please note there are two images used in the folder for the boot splash screen. Both need to be overwritten or you will still see parts of the old image.
To Replace the logo.bin file in the phone MTK client is required again. Using the special button combinations again, it is possible to overite the original logo.bin with the custom generated one.
C:\Users\Gamer\Desktop\mtkclient-main\mtkclient-main>python3 mtk.py w logo C:\Users\Gamer\Desktop\boot_images\logo.bin
MTK Flash/Exploit Client Public V2.0.1 (c) B.Kerler 2018-2024

Preloader - Status: Waiting for PreLoader VCOM, please reconnect mobile to brom mode

Port - Hint:

Power off the phone before connecting.
For brom mode, press and hold vol up, vol dwn, or all hw buttons and connect usb.
For preloader mode, don't press any hw button and connect usb.
If it is already connected and on, hold power for 10 seconds to reset.


..


Port - Device detected :)
Preloader -     CPU:                    MT6739/MT6731/MT8765()
Preloader -     HW version:             0x0
Preloader -     WDT:                    0x10007000
Preloader -     Uart:                   0x11002000
Preloader -     Brom payload addr:      0x100a00
Preloader -     DA payload addr:        0x201000
Preloader -     CQ_DMA addr:            0x10212000
Preloader -     Var1:                   0xb4
Preloader - Disabling Watchdog...
Preloader - HW code:                    0x699
Preloader - Target config:              0x0
Preloader -     SBC enabled:            False
Preloader -     SLA enabled:            False
Preloader -     DAA enabled:            False
Preloader -     SWJTAG enabled:         False
Preloader -     EPP_PARAM at 0x600 after EMMC_BOOT/SDMMC_BOOT:  False
Preloader -     Root cert required:     False
Preloader -     Mem read auth:          False
Preloader -     Mem write auth:         False
Preloader -     Cmd 0xC8 blocked:       False
Preloader - Get Target info
Preloader -     HW subcode:             0x8a00
Preloader -     HW Ver:                 0xcb00
Preloader -     SW Ver:                 0x2
Preloader - ME_ID:                      8C9061A2190D6F2C543FF335D358DBB6
Preloader - SOC_ID:                     4A13B658562E8689A847DCA687CFE3C339F3C1866DABBF304FFCD5EEC4CF47D4
DaHandler - Device is unprotected.
DaHandler - Device is in Preloader-Mode.
DAXFlash - Uploading xflash stage 1 from MTK_DA_V5.bin
XFlashExt - Patching da1 ...
Mtk - Patched "Patched loader msg" in preloader
Mtk - Patched "hash_check" in preloader
Mtk - Patched "Patched loader msg" in preloader
Mtk - Patched "get_vfy_policy" in preloader
XFlashExt - Patching da2 ...
XFlashExt - Security check patched
XFlashExt - DA version anti-rollback patched
XFlashExt - SBC patched to be disabled
XFlashExt - Register read/write not allowed patched
DAXFlash - Successfully uploaded stage 1, jumping ..
Preloader - Jumping to 0x200000
Preloader - Jumping to 0x200000: ok.
DAXFlash - Successfully received DA sync
DAXFlash - Uploading stage 2...
DAXFlash - Upload data was accepted. Jumping to stage 2...
DAXFlash - Boot to succeeded.
DAXFlash - Successfully uploaded stage 2
DAXFlash - DA SLA is disabled
DAXFlash - EMMC FWVer:      0x0
DAXFlash - EMMC ID:         QE63MB
DAXFlash - EMMC CID:        150100514536334d4203aba6f2a5954b
DAXFlash - EMMC Boot1 Size: 0x400000
DAXFlash - EMMC Boot2 Size: 0x400000
DAXFlash - EMMC GP1 Size:   0x0
DAXFlash - EMMC GP2 Size:   0x0
DAXFlash - EMMC GP3 Size:   0x0
DAXFlash - EMMC GP4 Size:   0x0
DAXFlash - EMMC RPMB Size:  0x400000
DAXFlash - EMMC USER Size:  0x3a3e00000
DAXFlash - HW-CODE         : 0x699
DAXFlash - HWSUB-CODE      : 0x8A00
DAXFlash - HW-VERSION      : 0xCB00
DAXFlash - SW-VERSION      : 0x2
DAXFlash - CHIP-EVOLUTION  : 0x0
DAXFlash - DA-VERSION      : 1.0
DAXFlash - Extensions were accepted. Jumping to extensions...
DAXFlash - Boot to succeeded.
DAXFlash - DA Extensions successfully added
Progress: |██████████| 100.0% Write (0xD8/0xD8, ) 2.00 MB/s
Wrote C:\Users\Gamer\Desktop\boot_images\logo.bin to sector 602368 with sector count 16384.

C:\Users\Gamer\Desktop\mtkclient-main\mtkclient-main>
Remove the battery once completed and put it back into the radios body then power on the radio. The changes should now be displayed.
Create Custom Boot Animation (Optional Slower Booting Times)
If you have opted to create a custom boot animation, please note this may add even more time to the boot process.
Download and unzip, then navigate into its path with command prompt, then install the tools requirements.
pip3 install -r requirements.txt
By Default this script seems to fail with its own example. I found by commenting out the lines 80 and 81 in gifextract.py the code then works with the example gif.
   # If the GIF uses local colour tables, each frame will have its
   # own palette.
   # If not, we need to apply the global palette to the new frame.
   # if not im.getpalette():
   #   im.putpalette(p)
A Note From Downloading the original boot animations and opening up the zip there is a file called desc.txt this has the resolution and FPS used for crafting the commandline up.
240 320 10
p 1 0 part0
p 0 0 part1
Create an example boot animation for testing.
C:\Users\Gamer\Desktop\create_android_bootanimation-master\create_android_bootanimation-master>python3 create_bootanimation.py C:\Users\Gamer\Desktop\create_android_bootanimation-master\create_android_bootanimation-master\example\example.gif 240 320 10 C:\Users\Gamer\Desktop\create_android_bootanimation-master\create_android_bootanimation-master\ -zip
C:\Users\Gamer\Desktop\create_android_bootanimation-master\create_android_bootanimation-master\create_bootanimation.py:160: DeprecationWarning: LANCZOS is deprecated and will be removed in Pillow 10 (2023-07-01). Use Resampling.LANCZOS instead.
  original_img = original_img.resize((t_width, height_size), Image.LANCZOS)
Done

C:\Users\Gamer\Desktop\create_android_bootanimation-master\create_android_bootanimation-master>
Copy the created animation over to the radio into the /sdcard/Download directory
C:\Users\Gamer\adb-fastboot\platform-tools>adb push bootanimation.zip /sdcard/Download/
bootanimation.zip: 1 file pushed, 0 skipped. 31.3 MB/s (431239 bytes in 0.013s)

C:\Users\Gamer\adb-fastboot\platform-tools>
Become a super user and then move the copied animation to /data/adb/
C:\Users\Gamer\adb-fastboot\platform-tools>adb shell
m3_h:/ $ su
m3_h:/ # mv /sdcard/Download/bootanimation.zip /data/adb/
m3_h:/ #
Soft Overwrite The Boot & Shutdown Animations (Optional Slower Booting Times)
m3_h:/ # chown root:root /data/adb/bootanimation.zip
m3_h:/ # chmod 0644 /data/adb/bootanimation.zip
m3_h:/ # chcon -v u:object_r:system_file:s0 /data/adb/bootanimation.zip
chcon '/data/adb/bootanimation.zip' to u:object_r:system_file:s0

m3_h:/ # echo "mount -o bind /data/adb/bootanimation.zip   /system/media/bootanimation.zip" >> /data/adb/service.d/change_bootanimation.sh
m3_h:/ # echo "mount -o bind /data/adb/bootanimation.zip   /system/media/shutanimation.zip" >> /data/adb/service.d/change_bootanimation.sh
m3_h:/ # chmod 755 /data/adb/service.d/change_bootanimation.sh
m3_h:/ # reboot
Soft Overwrite The Boot and Shutdown Audio (Optional Slower Booting Times)
Please note if you replace the audio with a custom animation this will work using the touch command creating a blank file. If
you decide to keep the original boot animation you will need to replace it with a real audio file or the radio does not fully boot,
although its still accessible via adb to revert changes.
m3_h:/ # touch /data/adb/shutaudio.mp3
m3_h:/ # chmod 0644 /data/adb/shutaudio.mp3
m3_h:/ # chcon -v u:object_r:system_file:s0 /data/adb/shutaudio.mp3
chcon '/data/adb/shutaudio.mp3' to u:object_r:system_file:s0
m3_h:/ # echo "mount -o bind /data/adb/shutaudio.mp3   /system/media/shutaudio.mp3" >> /data/adb/service.d/change_bootanimation.sh
m3_h:/ # echo "mount -o bind /data/adb/shutaudio.mp3   /system/media/bootaudio.mp3" >> /data/adb/service.d/change_bootanimation.sh
m3_h:/ # chmod 755 /data/adb/service.d/change_bootanimation.sh
m3_h:/ # reboot
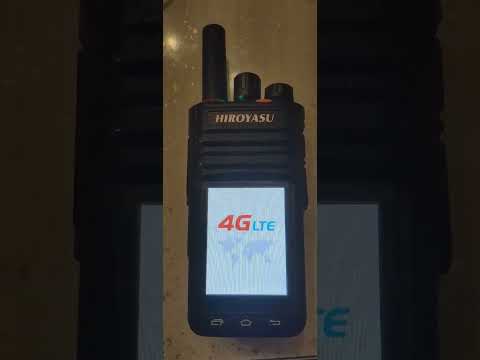
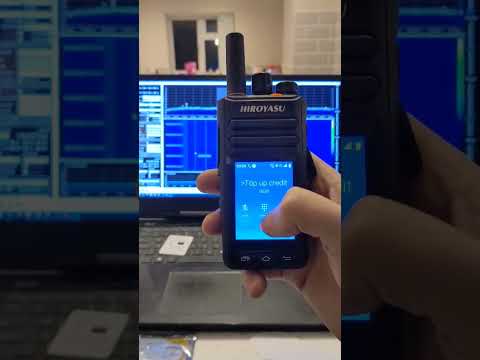
Example Youtube short of the replaced boot animation and audio files.

File System Modification (Preferred Method):
Dump The Filesystem
Using MTKClient it is also possible to dump the file system allowing for mounting and editing using a Linux operating system.
But first we need to dump the radios root filesystem directory known as / in this case.
C:\Users\Gamer\Desktop\mtkclient-main\mtkclient-main>python3 mtk.py r system system-backup.img
MTK Flash/Exploit Client Public V2.0.1 (c) B.Kerler 2018-2024

Preloader - Status: Waiting for PreLoader VCOM, please reconnect mobile to brom mode


Port - Hint:

Power off the phone before connecting.
For brom mode, press and hold vol up, vol dwn, or all hw buttons and connect usb.
For preloader mode, don't press any hw button and connect usb.
If it is already connected and on, hold power for 10 seconds to reset.


Port - Device detected :)
Preloader -     CPU:                    MT6739/MT6731/MT8765()
Preloader -     HW version:             0x0
Preloader -     WDT:                    0x10007000
Preloader -     Uart:                   0x11002000
Preloader -     Brom payload addr:      0x100a00
Preloader -     DA payload addr:        0x201000
Preloader -     CQ_DMA addr:            0x10212000
Preloader -     Var1:                   0xb4
Preloader - Disabling Watchdog...
Preloader - HW code:                    0x699
Preloader - Target config:              0x0
Preloader -     SBC enabled:            False
Preloader -     SLA enabled:            False
Preloader -     DAA enabled:            False
Preloader -     SWJTAG enabled:         False
Preloader -     EPP_PARAM at 0x600 after EMMC_BOOT/SDMMC_BOOT:  False
Preloader -     Root cert required:     False
Preloader -     Mem read auth:          False
Preloader -     Mem write auth:         False
Preloader -     Cmd 0xC8 blocked:       False
Preloader - Get Target info
Preloader -     HW subcode:             0x8a00
Preloader -     HW Ver:                 0xcb00
Preloader -     SW Ver:                 0x2
Preloader - ME_ID:                      8C9061A2190D6F2C543FF335D358DBB6
Preloader - SOC_ID:                     4A13B658562E8689A847DCA687CFE3C339F3C1866DABBF304FFCD5EEC4CF47D4
DaHandler - Device is unprotected.
DaHandler - Device is in Preloader-Mode.
DAXFlash - Uploading xflash stage 1 from MTK_DA_V5.bin
XFlashExt - Patching da1 ...
Mtk - Patched "Patched loader msg" in preloader
Mtk - Patched "hash_check" in preloader
Mtk - Patched "Patched loader msg" in preloader
Mtk - Patched "get_vfy_policy" in preloader
XFlashExt - Patching da2 ...
XFlashExt - Security check patched
XFlashExt - DA version anti-rollback patched
XFlashExt - SBC patched to be disabled
XFlashExt - Register read/write not allowed patched
DAXFlash - Successfully uploaded stage 1, jumping ..
Preloader - Jumping to 0x200000
Preloader - Jumping to 0x200000: ok.
DAXFlash - Successfully received DA sync
DAXFlash - Uploading stage 2...
DAXFlash - Upload data was accepted. Jumping to stage 2...
DAXFlash - Boot to succeeded.
DAXFlash - Successfully uploaded stage 2
DAXFlash - DA SLA is disabled
DAXFlash - EMMC FWVer:      0x0
DAXFlash - EMMC ID:         QE63MB
DAXFlash - EMMC CID:        150100514536334d4203aba6f2a5954b
DAXFlash - EMMC Boot1 Size: 0x400000
DAXFlash - EMMC Boot2 Size: 0x400000
DAXFlash - EMMC GP1 Size:   0x0
DAXFlash - EMMC GP2 Size:   0x0
DAXFlash - EMMC GP3 Size:   0x0
DAXFlash - EMMC GP4 Size:   0x0
DAXFlash - EMMC RPMB Size:  0x400000
DAXFlash - EMMC USER Size:  0x3a3e00000
DAXFlash - HW-CODE         : 0x699
DAXFlash - HWSUB-CODE      : 0x8A00
DAXFlash - HW-VERSION      : 0xCB00
DAXFlash - SW-VERSION      : 0x2
DAXFlash - CHIP-EVOLUTION  : 0x0
DAXFlash - DA-VERSION      : 1.0
DAXFlash - Extensions were accepted. Jumping to extensions...
DAXFlash - Boot to succeeded.
DAXFlash - DA Extensions successfully added
DaHandler - Requesting available partitions ....
DaHandler - Dumping partition "system"
Progress: |██████████| 100.0% Read (0x264000/0x264000, ) 15.77 MB/s06 MB/sB/s
DaHandler - Dumped sector 1294336 with sector count 2506752 as system-backup.img.

C:\Users\Gamer\Desktop\mtkclient-main\mtkclient-main>
Edit The Filesystem
With a Linux computer system or Virtual Machine its possible to mount the root filesystem that was backed up and make changes.
In the below example we was using a Kali virtual machine inside of Virtual Box.
We also mapped a temp share to are Desktop where we had the mtkclient directory which the backup of the system.img was saved.
Please note we also made a copy of this file as it will be edited when you mount and any miss haps could result in a broken filesystem.
If you have any problem please remeber you can always restore the device with the backup created at the start of the project.
Create a folder to mount the file system into:
┌──(kali㉿kali)-[~]
└─$ sudo mkdir /mnt/android
[sudo] password for kali:
Navigate to where the system.img backup was saved. In this example was a share between a windows host and a kali Linux Virtual
Machine mapped to Desktop, This results in a path in kali linux of /media/sf_Desktop/ we then needed to nagivate to the
directory which stored the downloaded system.img file:
┌──(kali㉿kali)-[~]
└─$ cd /media/sf_Desktop/mtkclient-main/mtkclient-main
The system image file now needs to be mounted the to the directory privously made folder in this example /mnt/android:
┌──(kali㉿kali)-[/media/sf_Desktop/mtkclient-main/mtkclient-main]
└─$ sudo mount -t ext4 -o loop system-backup.img /mnt/android
Navigate to the mounted filesystem in the privously made folder:
┌──(kali㉿kali)-[/media/sf_Desktop/mtkclient-main/mtkclient-main]
└─$ cd /mnt/android
List the directory structure to ensure it was mounted correctly:
┌──(kali㉿kali)-[/mnt/android]
└─$ ls
acct  bugreports  charger  d     default.prop  etc               init             init.rc               init.usb.rc       lost+found  odm  proc     sbin    storage  system      vendor
bin   cache       config   data  dev           fstab.enableswap  init.environ.rc  init.usb.configfs.rc  init.zygote32.rc  mnt         oem  product  sdcard  sys      ueventd.rc  verity_key
We wanted to remove all the boot animations files so we then navigate to the directory, located in the system/media:
┌──(kali㉿kali)-[/mnt/android]
└─$ cd system/media
List the directory structure again and we can see the files i want to remove:
┌──(kali㉿kali)-[/mnt/android/system/media]
└─$ ls
audio  bootanimation.zip  bootaudio.mp3  shutanimation.zip  shutaudio.mp3
Remove the files that are no longer needed. Note the sudo command or you will get permission denied:
┌──(kali㉿kali)-[/mnt/android/system/media]
└─$ sudo rm bootaudio.mp3 bootanimation.zip shutanimation.zip shutaudio.mp3
Check the Files have gone.
┌──(kali㉿kali)-[/mnt/android/system/media]
└─$ ls
audio
While testing, it was found that removing all the audio files and animations caused the radio to boot up with the stock android boot animation screen, It then got stuck at this point, although the system was still accessible via adb it was found not to be possible to navigate through the radios screen any more.
To resolve this process it was possible to supply your own bootanimation.zip by replacing the original or just by disabling the animation all together. This is what we opted for in the process of this guide.
To disable the boot animations without having to root the radio, you can edit the default.prop file inside the mounted file system.
Please note you also have to be root/sudo on the local Linux system for completing this as you will get permission denied problems.
In the original default.prop file at the bottom of the ADDITIONAL_DEFAULT_PROPERTIES their is a line with the values of ro.base_build=noah
a new line needs to be appended to this file with your favourite Linux text editor of debug.sf.nobootanimation=1.
Original default.prop:
┌──(kali㉿kali)-[/mnt/android]
└─$ sudo cat default.prop
#
# ADDITIONAL_DEFAULT_PROPERTIES
#
ro.actionable_compatible_property.enabled=true
ro.secure=1
security.perf_harden=1
ro.adb.secure=0
ro.allow.mock.location=0
ro.debuggable=1
ro.audio.usb.period_us=16000
ro.camera.api1.max_preview_size=960x540
ro.mediatek.platform=MT6739
dalvik.vm.image-dex2oat-Xms=64m
dalvik.vm.image-dex2oat-Xmx=64m
dalvik.vm.dex2oat-Xms=64m
dalvik.vm.dex2oat-Xmx=512m
dalvik.vm.usejit=true
dalvik.vm.usejitprofiles=true
dalvik.vm.dexopt.secondary=true
dalvik.vm.appimageformat=lz4
pm.dexopt.first-boot=quicken
pm.dexopt.boot=verify
pm.dexopt.install=speed-profile
pm.dexopt.bg-dexopt=speed-profile
pm.dexopt.ab-ota=speed-profile
pm.dexopt.inactive=verify
pm.dexopt.shared=speed
dalvik.vm.dex2oat-minidebuginfo=true
debug.atrace.tags.enableflags=0
ro.hwui.path_cache_size=0
ro.hwui.text_small_cache_width=512
ro.hwui.text_small_cache_height=256
ro.hwui.disable_asset_atlas=true
ro.mediatek.version.branch=alps-mp-p0.mp1
ro.mediatek.version.release=alps-mp-p0.mp1-V5.10
ro.opa.eligible_device=true
ro.setupwizard.mode=OPTIONAL
setupwizard.feature.predeferred_enabled=false
ro.com.google.gmsversion=9_201903
ro.com.android.mobiledata=true
ro.base_build=noah
#
# BOOTIMAGE_BUILD_PROPERTIES
#
ro.bootimage.build.date=Fri Nov 8 17:35:50 CST 2024
ro.bootimage.build.date.utc=1731058550
ro.bootimage.build.fingerpri
Edited default.prop file:
┌──(kali㉿kali)-[/mnt/android]
└─$ sudo cat default.prop
#
# ADDITIONAL_DEFAULT_PROPERTIES
#
ro.actionable_compatible_property.enabled=true
ro.secure=1
security.perf_harden=1
ro.adb.secure=0
ro.allow.mock.location=0
ro.debuggable=1
ro.audio.usb.period_us=16000
ro.camera.api1.max_preview_size=960x540
ro.mediatek.platform=MT6739
dalvik.vm.image-dex2oat-Xms=64m
dalvik.vm.image-dex2oat-Xmx=64m
dalvik.vm.dex2oat-Xms=64m
dalvik.vm.dex2oat-Xmx=512m
dalvik.vm.usejit=true
dalvik.vm.usejitprofiles=true
dalvik.vm.dexopt.secondary=true
dalvik.vm.appimageformat=lz4
pm.dexopt.first-boot=quicken
pm.dexopt.boot=verify
pm.dexopt.install=speed-profile
pm.dexopt.bg-dexopt=speed-profile
pm.dexopt.ab-ota=speed-profile
pm.dexopt.inactive=verify
pm.dexopt.shared=speed
dalvik.vm.dex2oat-minidebuginfo=true
debug.atrace.tags.enableflags=0
ro.hwui.path_cache_size=0
ro.hwui.text_small_cache_width=512
ro.hwui.text_small_cache_height=256
ro.hwui.disable_asset_atlas=true
ro.mediatek.version.branch=alps-mp-p0.mp1
ro.mediatek.version.release=alps-mp-p0.mp1-V5.10
ro.opa.eligible_device=true
ro.setupwizard.mode=OPTIONAL
setupwizard.feature.predeferred_enabled=false
ro.com.google.gmsversion=9_201903
ro.com.android.mobiledata=true
ro.base_build=noah
debug.sf.nobootanimation=1
#
# BOOTIMAGE_BUILD_PROPERTIES
#
ro.bootimage.build.date=Fri Nov 8 17:35:50 CST 2024
ro.bootimage.build.date.utc=1731058550
ro.bootimage.build.fingerpri
Upon completion of editing the default.prop file we next need to navigate out of the mounted filesystem ready for unmounting.
Note if you do not perform this step it will complain when you try to run the next command in the process.
┌──(kali㉿kali)-[/mnt/android/system/media]
└─$ cd
Finally for the linux side of things, Unmount the Filesystem
┌──(kali㉿kali)-[~]
└─$ sudo umount /mnt/android
Upload Edited Filesystem
Once the filesystem has been edited the last part of the process is to just upload it back to the radio. Once completed remove the battery and usb cable, Reconnect the battery and start up your radio with no sounds or animation.
C:\Users\Gamer\Desktop\mtkclient-main\mtkclient-main>python3 mtk.py w system system-backup.img
MTK Flash/Exploit Client Public V2.0.1 (c) B.Kerler 2018-2024

Preloader - Status: Waiting for PreLoader VCOM, please reconnect mobile to brom mode

Port - Hint:

Power off the phone before connecting.
For brom mode, press and hold vol up, vol dwn, or all hw buttons and connect usb.
For preloader mode, don't press any hw button and connect usb.
If it is already connected and on, hold power for 10 seconds to reset.


..Port - Device detected :)
Preloader -     CPU:                    MT6739/MT6731/MT8765()
Preloader -     HW version:             0x0
Preloader -     WDT:                    0x10007000
Preloader -     Uart:                   0x11002000
Preloader -     Brom payload addr:      0x100a00
Preloader -     DA payload addr:        0x201000
Preloader -     CQ_DMA addr:            0x10212000
Preloader -     Var1:                   0xb4
Preloader - Disabling Watchdog...
Preloader - HW code:                    0x699
Preloader - Target config:              0x0
Preloader -     SBC enabled:            False
Preloader -     SLA enabled:            False
Preloader -     DAA enabled:            False
Preloader -     SWJTAG enabled:         False
Preloader -     EPP_PARAM at 0x600 after EMMC_BOOT/SDMMC_BOOT:  False
Preloader -     Root cert required:     False
Preloader -     Mem read auth:          False
Preloader -     Mem write auth:         False
Preloader -     Cmd 0xC8 blocked:       False
Preloader - Get Target info
Preloader -     HW subcode:             0x8a00
Preloader -     HW Ver:                 0xcb00
Preloader -     SW Ver:                 0x2
Preloader - ME_ID:                      8C9061A2190D6F2C543FF335D358DBB6
Preloader - SOC_ID:                     4A13B658562E8689A847DCA687CFE3C339F3C1866DABBF304FFCD5EEC4CF47D4
DaHandler - Device is unprotected.
DaHandler - Device is in Preloader-Mode.
DAXFlash - Uploading xflash stage 1 from MTK_DA_V5.bin
XFlashExt - Patching da1 ...
Mtk - Patched "Patched loader msg" in preloader
Mtk - Patched "hash_check" in preloader
Mtk - Patched "Patched loader msg" in preloader
Mtk - Patched "get_vfy_policy" in preloader
XFlashExt - Patching da2 ...
XFlashExt - Security check patched
XFlashExt - DA version anti-rollback patched
XFlashExt - SBC patched to be disabled
XFlashExt - Register read/write not allowed patched
DAXFlash - Successfully uploaded stage 1, jumping ..
Preloader - Jumping to 0x200000
Preloader - Jumping to 0x200000: ok.
DAXFlash - Successfully received DA sync
DAXFlash - Uploading stage 2...
DAXFlash - Upload data was accepted. Jumping to stage 2...
DAXFlash - Boot to succeeded.
DAXFlash - Successfully uploaded stage 2
DAXFlash - DA SLA is disabled
DAXFlash - EMMC FWVer:      0x0
DAXFlash - EMMC ID:         QE63MB
DAXFlash - EMMC CID:        150100514536334d4203aba6f2a5954b
DAXFlash - EMMC Boot1 Size: 0x400000
DAXFlash - EMMC Boot2 Size: 0x400000
DAXFlash - EMMC GP1 Size:   0x0
DAXFlash - EMMC GP2 Size:   0x0
DAXFlash - EMMC GP3 Size:   0x0
DAXFlash - EMMC GP4 Size:   0x0
DAXFlash - EMMC RPMB Size:  0x400000
DAXFlash - EMMC USER Size:  0x3a3e00000
DAXFlash - HW-CODE         : 0x699
DAXFlash - HWSUB-CODE      : 0x8A00
DAXFlash - HW-VERSION      : 0xCB00
DAXFlash - SW-VERSION      : 0x2
DAXFlash - CHIP-EVOLUTION  : 0x0
DAXFlash - DA-VERSION      : 1.0
DAXFlash - Extensions were accepted. Jumping to extensions...
DAXFlash - Boot to succeeded.
DAXFlash - DA Extensions successfully added
Progress: |██████████| 100.0% Write (0x264000/0x264000, ) 4.61 MB/s60 MB/sMB/s
Wrote system-backup.img to sector 1294336 with sector count 2506752.

C:\Users\Gamer\Desktop\mtkclient-main\mtkclient-main>
Once completed the radio should boot up with no boot animation or sounds. It is also possible to check to ensure the boot state is infact in the green state via adb.
m3_h:/ $ getprop ro.boot.verifiedbootstate
green
m3_h:/ $ ls /sy
sys/     system/
m3_h:/ $ ls /system/media/
audio
m3_h:/ $
As of 13-02-2025 we are working out the best way to replace the 4g LTE boot splash screen without having to unlock the boot loader which results in additional boot times.
Additional Commands & Modes
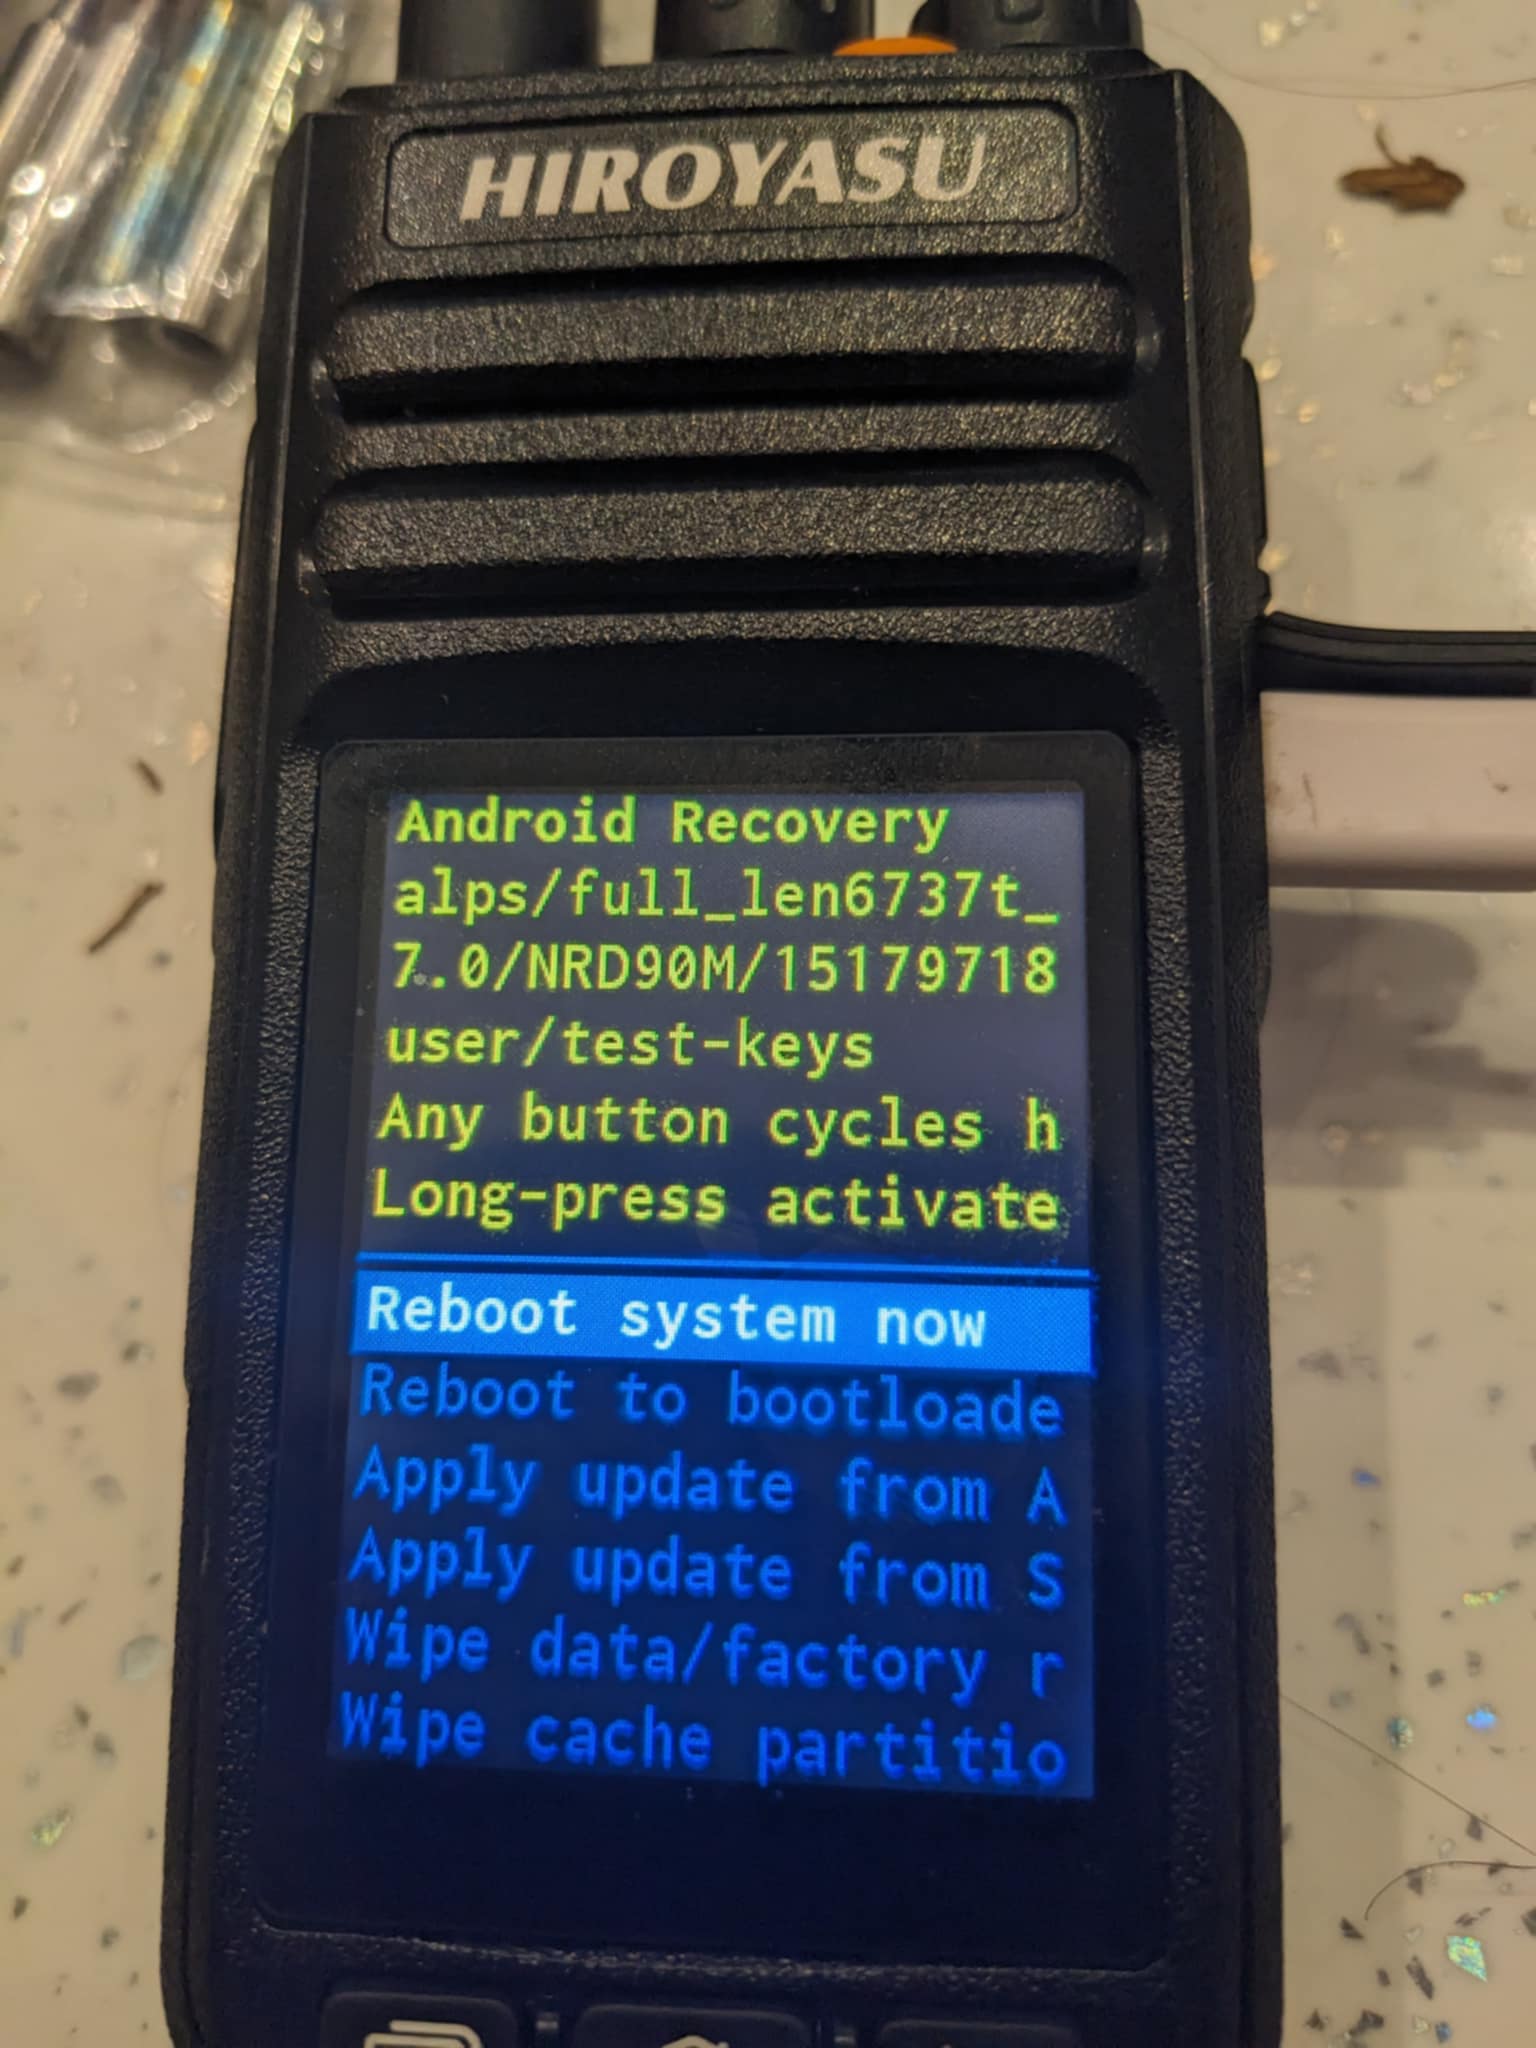
Boot Into Recovery Mode ( Unlocked Bootloader Required )
Booting into recovery mode was originally disabled and the radio would not do anything other than crash the display. When the bootloader is unlocked with the MTK client this allowed for recovery mode.
C:\Users\Gamer\adb-fastboot\platform-tools>adb reboot recovery
C:\Users\Gamer\adb-fastboot\platform-tools>
Then wait for the radio to reboot. you can now use the knob next to the antenna to the navigate up and down through the menu’s to select an item just hold down the orange emergency button on the top of the radio for a couple of seconds. Please note while in this mode the radio is also still available via adb.
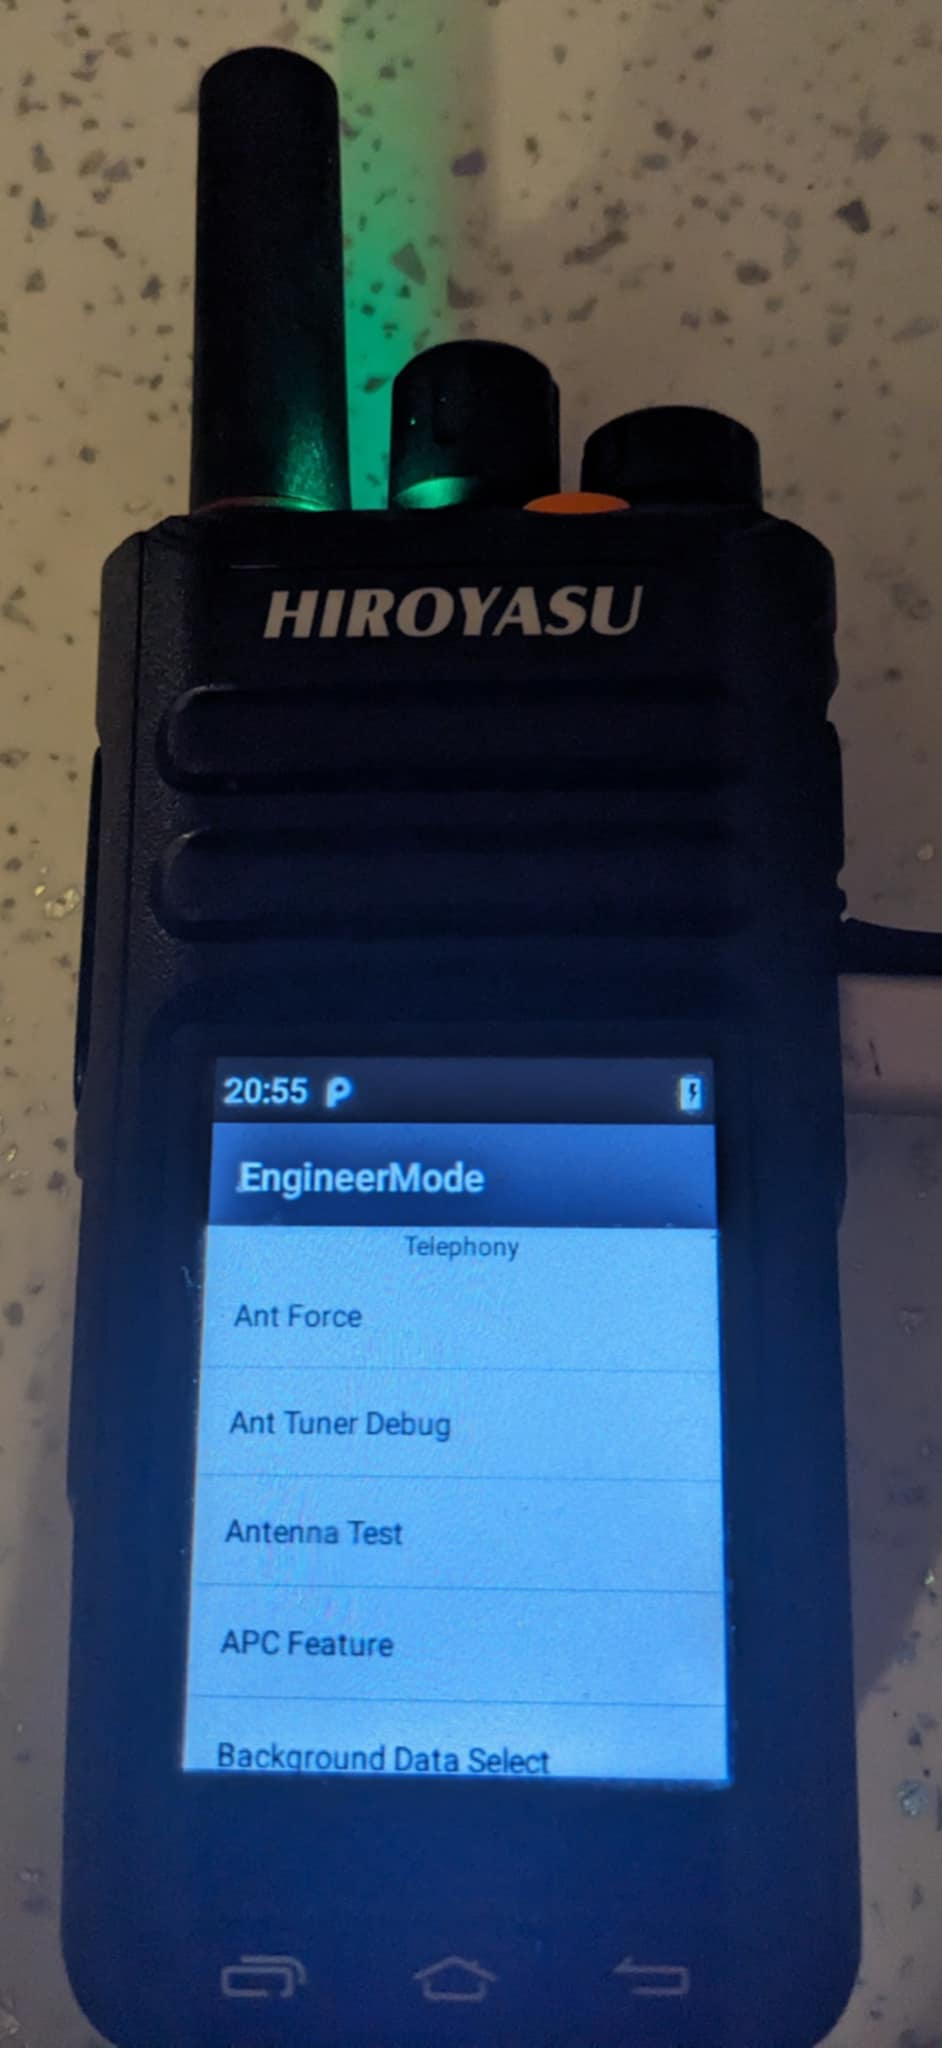
MTK Engineer Mode
Using the following command in the dial pad will enable some hidden features. Swipe left of right for other settings, use at your own risk.
Dial:
*#*#3646633#*#*
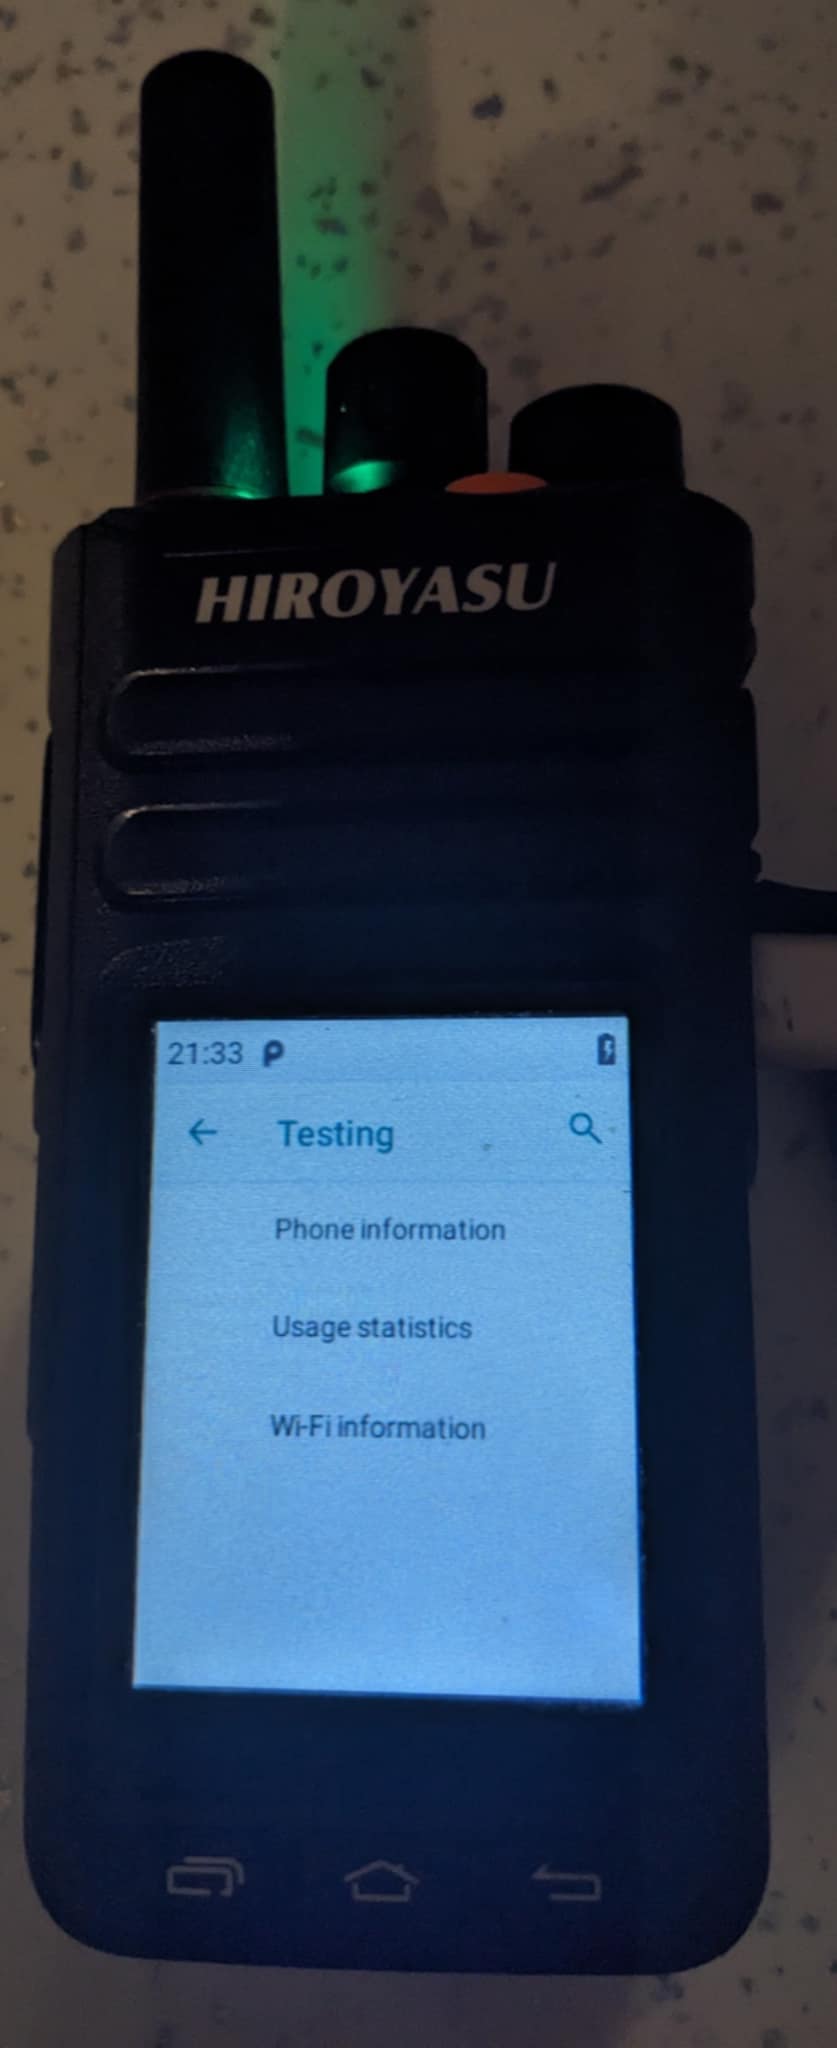
Radio Info
This has been renamed to ‘testing’ it seems but on most MTK phones it should be ‘Info’.
Dial:
*#*#4636#*#*
Enable / Disable App Installation
Like the engineering mode, navigate to the dial pad and enter the below codes. This will either enable of disable app installation on the radio.
Dial:
*#13579*#
Enabled:
Disabled:
Obtaining Bug reports
Additional information can be found here on bug reporting format
C:\Users\Gamer\adb-fastboot\platform-tools>adb bugreport bugreport
/data/user_de/0/com.android.shell/files/bugreports/bugrepo...file pulled, 0 skipped. 8.8 MB/s (1226237 bytes in 0.132s)
Bug report copied to bugreport.zip

C:\Users\Gamer\adb-fastboot\platform-tools>
View IMIE & MEID
Dial:
*#06#
Restoring Full Backup
Please note this will take about a hour to complete.
C:\Users\Gamer\Desktop\mtkclient-main\mtkclient-main>python3 mtk.py wf full-backup.img
MTK Flash/Exploit Client Public V2.0.1 (c) B.Kerler 2018-2024

Preloader - Status: Waiting for PreLoader VCOM, please reconnect mobile to brom mode

Port - Hint:

Power off the phone before connecting.
For brom mode, press and hold vol up, vol dwn, or all hw buttons and connect usb.
For preloader mode, don't press any hw button and connect usb.
If it is already connected and on, hold power for 10 seconds to reset.


...........
Port - Device detected :)
Preloader -     CPU:                    MT6739/MT6731/MT8765()
Preloader -     HW version:             0x0
Preloader -     WDT:                    0x10007000
Preloader -     Uart:                   0x11002000
Preloader -     Brom payload addr:      0x100a00
Preloader -     DA payload addr:        0x201000
Preloader -     CQ_DMA addr:            0x10212000
Preloader -     Var1:                   0xb4
Preloader - Disabling Watchdog...
Preloader - HW code:                    0x699
Preloader - Target config:              0x0
Preloader -     SBC enabled:            False
Preloader -     SLA enabled:            False
Preloader -     DAA enabled:            False
Preloader -     SWJTAG enabled:         False
Preloader -     EPP_PARAM at 0x600 after EMMC_BOOT/SDMMC_BOOT:  False
Preloader -     Root cert required:     False
Preloader -     Mem read auth:          False
Preloader -     Mem write auth:         False
Preloader -     Cmd 0xC8 blocked:       False
Preloader - Get Target info
Preloader -     HW subcode:             0x8a00
Preloader -     HW Ver:                 0xcb00
Preloader -     SW Ver:                 0x2
Preloader - ME_ID:                      8C9061A2190D6F2C543FF335D358DBB6
Preloader - SOC_ID:                     4A13B658562E8689A847DCA687CFE3C339F3C1866DABBF304FFCD5EEC4CF47D4
DaHandler - Device is unprotected.
DaHandler - Device is in Preloader-Mode.
DAXFlash - Uploading xflash stage 1 from MTK_DA_V5.bin
XFlashExt - Patching da1 ...
Mtk - Patched "Patched loader msg" in preloader
Mtk - Patched "hash_check" in preloader
Mtk - Patched "Patched loader msg" in preloader
Mtk - Patched "get_vfy_policy" in preloader
XFlashExt - Patching da2 ...
XFlashExt - Security check patched
XFlashExt - DA version anti-rollback patched
XFlashExt - SBC patched to be disabled
XFlashExt - Register read/write not allowed patched
DAXFlash - Successfully uploaded stage 1, jumping ..
Preloader - Jumping to 0x200000
Preloader - Jumping to 0x200000: ok.
DAXFlash - Successfully received DA sync
DAXFlash - Uploading stage 2...
DAXFlash - Upload data was accepted. Jumping to stage 2...
DAXFlash - Boot to succeeded.
DAXFlash - Successfully uploaded stage 2
DAXFlash - DA SLA is disabled
DAXFlash - EMMC FWVer:      0x0
DAXFlash - EMMC ID:         QE63MB
DAXFlash - EMMC CID:        150100514536334d4203aba6f2a5954b
DAXFlash - EMMC Boot1 Size: 0x400000
DAXFlash - EMMC Boot2 Size: 0x400000
DAXFlash - EMMC GP1 Size:   0x0
DAXFlash - EMMC GP2 Size:   0x0
DAXFlash - EMMC GP3 Size:   0x0
DAXFlash - EMMC GP4 Size:   0x0
DAXFlash - EMMC RPMB Size:  0x400000
DAXFlash - EMMC USER Size:  0x3a3e00000
DAXFlash - HW-CODE         : 0x699
DAXFlash - HWSUB-CODE      : 0x8A00
DAXFlash - HW-VERSION      : 0xCB00
DAXFlash - SW-VERSION      : 0x2
DAXFlash - CHIP-EVOLUTION  : 0x0
DAXFlash - DA-VERSION      : 1.0
DAXFlash - Extensions were accepted. Jumping to extensions...
DAXFlash - Boot to succeeded.
DAXFlash - DA Extensions successfully added
Progress: |██████████| 100.0% Write (0x1D1F000/0x1D1F000, ) 4.35 MB/s.16 MB/sB/s
Wrote full-backup.img to sector 0 with sector count 30535680.

C:\Users\Gamer\Desktop\mtkclient-main\mtkclient-main>
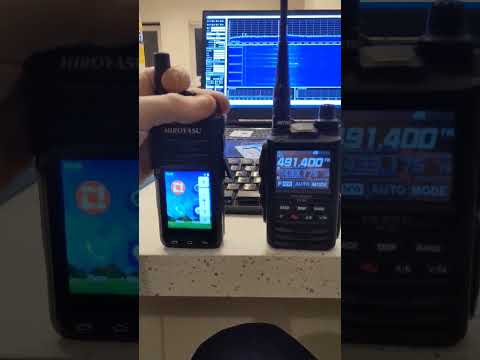
QRM From The Screen (Warning)
QRM from the screen could make it possible for goverments and other snoopers possible to know when using the radio. Due to the screen leaking noise. One of the known frequencys that the radio can be heard on is 491.4
This has not been tested but it might be possible to use TempestSdr to spy one the screen this is in current testing.
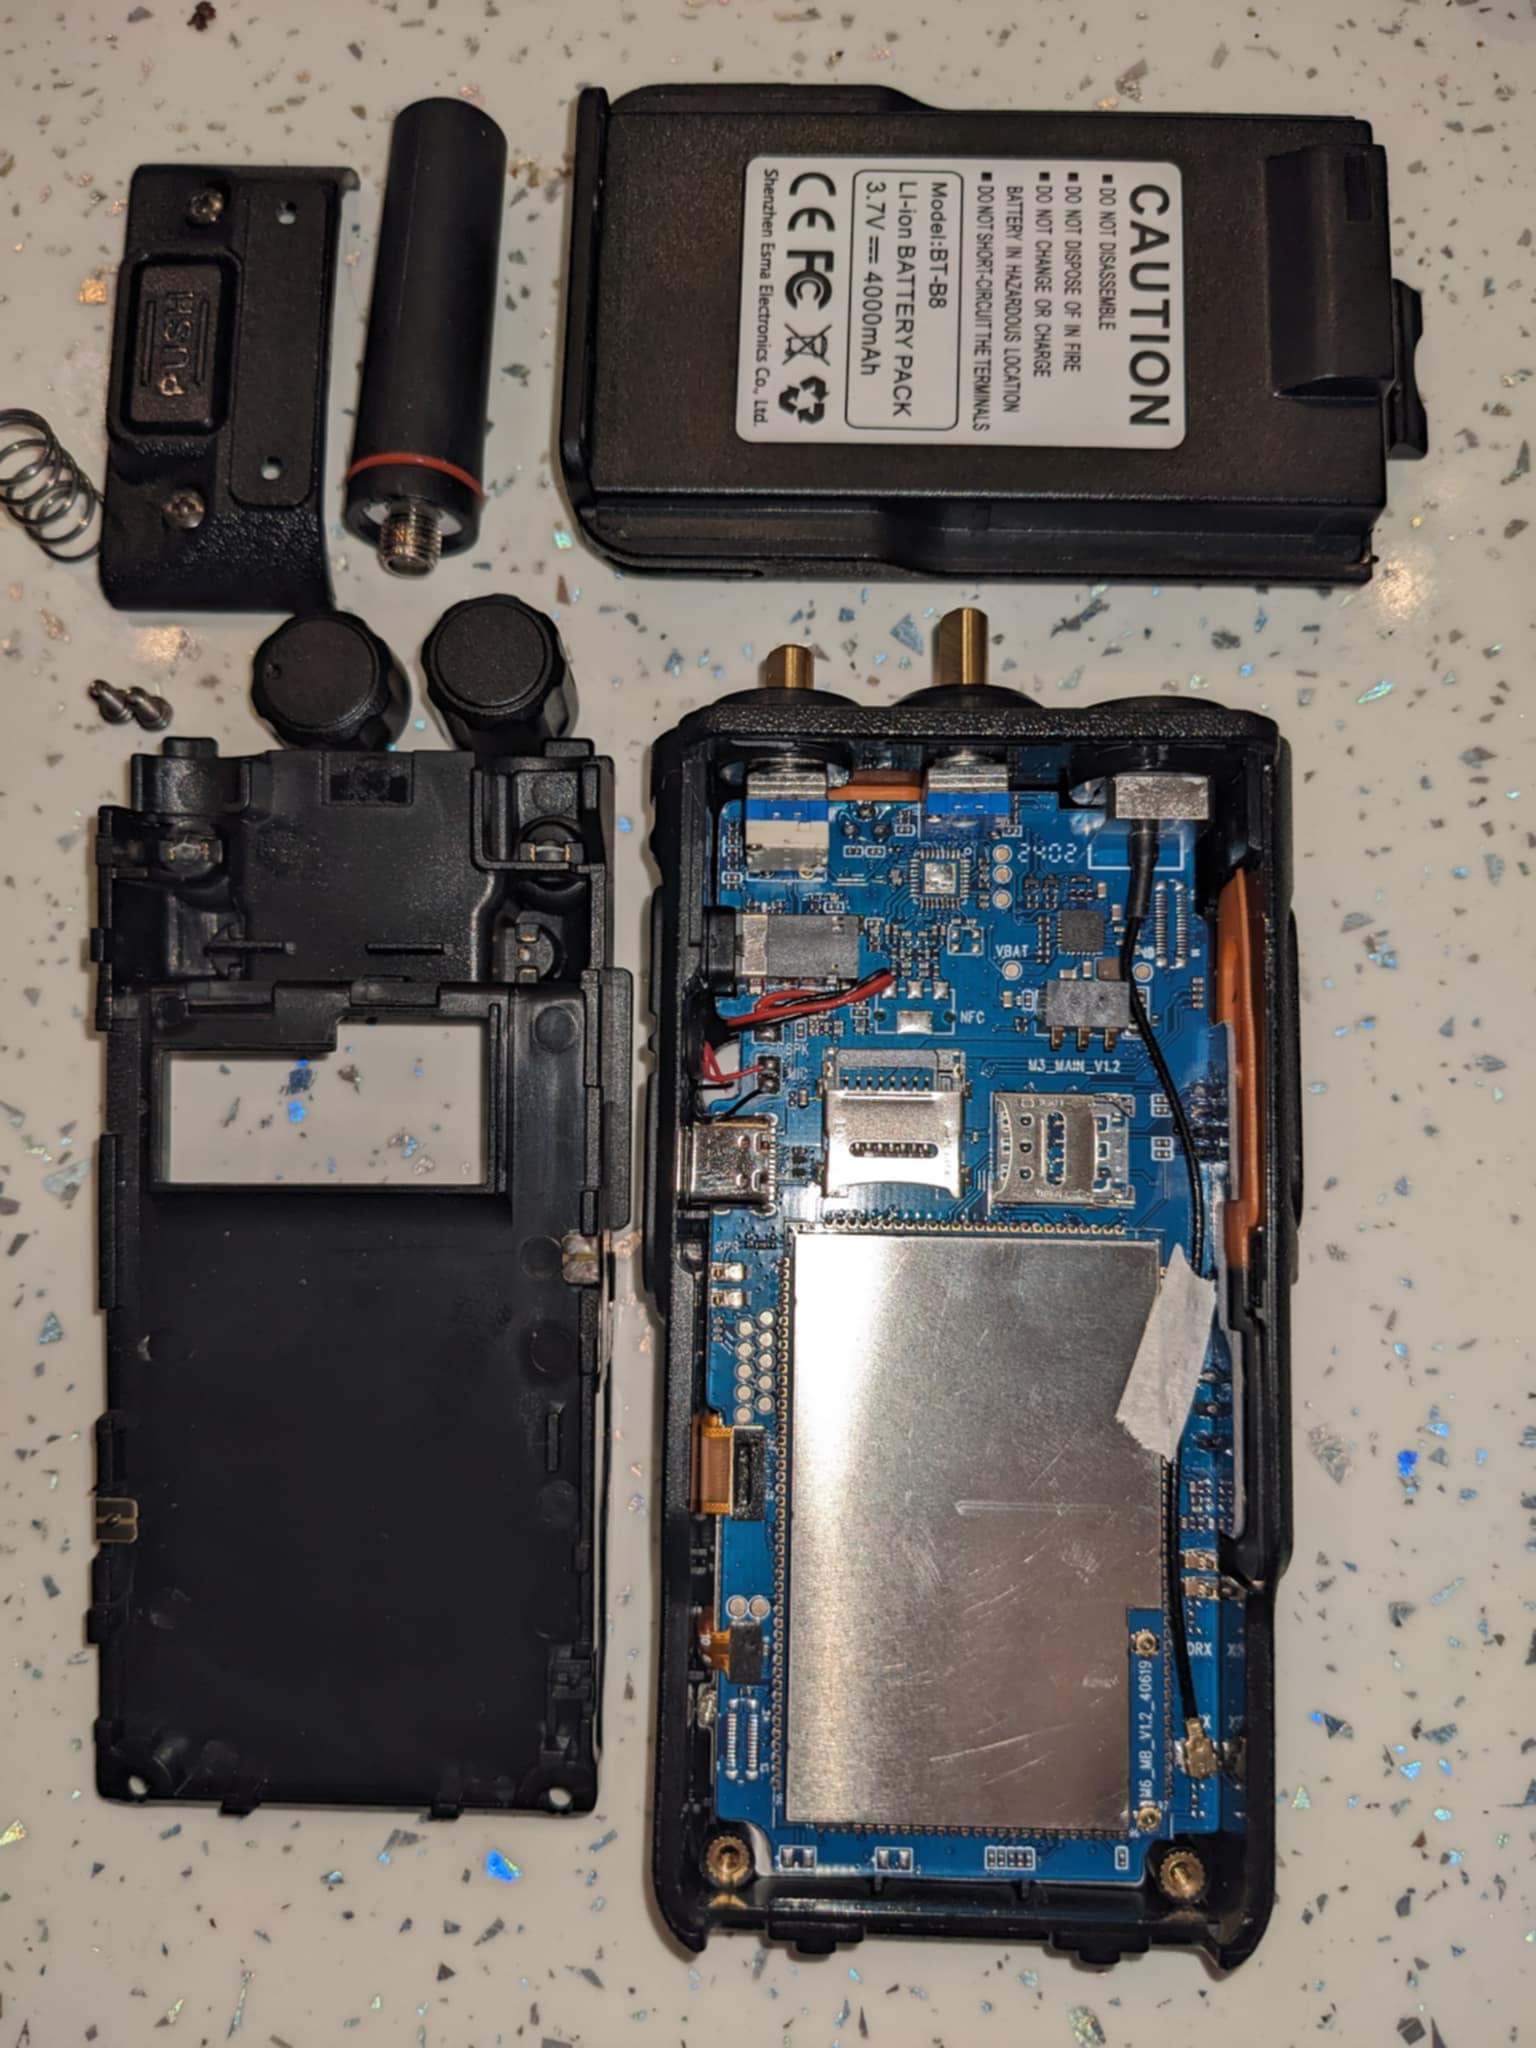
Internals
Removing the shell there are two security screws at the bottom of the radio behind the battery. Using a small Allen key will loosen the screws if you do not have the correct tool. Finally, there are a couple of clips holding the cover on, using a set of tweezers it was possible to pull the cover off the back revealing the internals.
Additional Notes
Preloader Mode ( Possibly Bricked )
For a example if the boot loader is locked and a custom boot splash image was applied. The radio would seem to no longer boot but when plugged into a computer their are sounds from the computer where the radio is switching modes.
- Power Off The Radio With A USB Cabled Left Plugged Into the radio and the laptop end. Remove The Battery.
- Reconnect The Battery And wait for the USB connection notification sound on the computer.
- Disconnect and reconnect the battery again and it should now be detected.
From this point it is still possible to unbrick the device with the full image backup that should of been created when starting this guide.
Resources
- Video that provides some Pointers in rooting mtk devices.
- Mtk Client
- LogoBuilder
- Magisk
Credits
- All the people who contributed and created MTK Client.
- The Creator of LogoBuilder
- The Creator of Magisk
- Thanks to Jeremy Turner M1CVZ for ordering the radio allowing M7SYN to perform the rooting process.
- Editing & proof-reading done by Ben Brown